

 Good Morning, Quilters! Today is the first Tuesday in May and just days away from Mother’s Day! If you skip the housekeeping and paperwork for a few days, you can whip up a little something for YOUR Mother with this sweet little confection: Tulip Time.
There’s no time to lose–so let’s get started!
WAIT—-JUST A LITTLE FYI
A reader wrote me this week because she just noticed the “MENU” Bar on the top of my blog–and asked if it was new…
The Menu Bar has been around since the beginning, but I think if you read The Inbox Jaunt from your phone it is not as noticeable….
PLEASE check out the Menu Bar…All of the tutorials are there, plus design tips, a few projects, a selection of books I recommend…much much more.
Coming Soon To The Menu Bar—-The Quilt Notebook Series and The Paper Pieced Patterns
TULIP TIME TUTORIAL
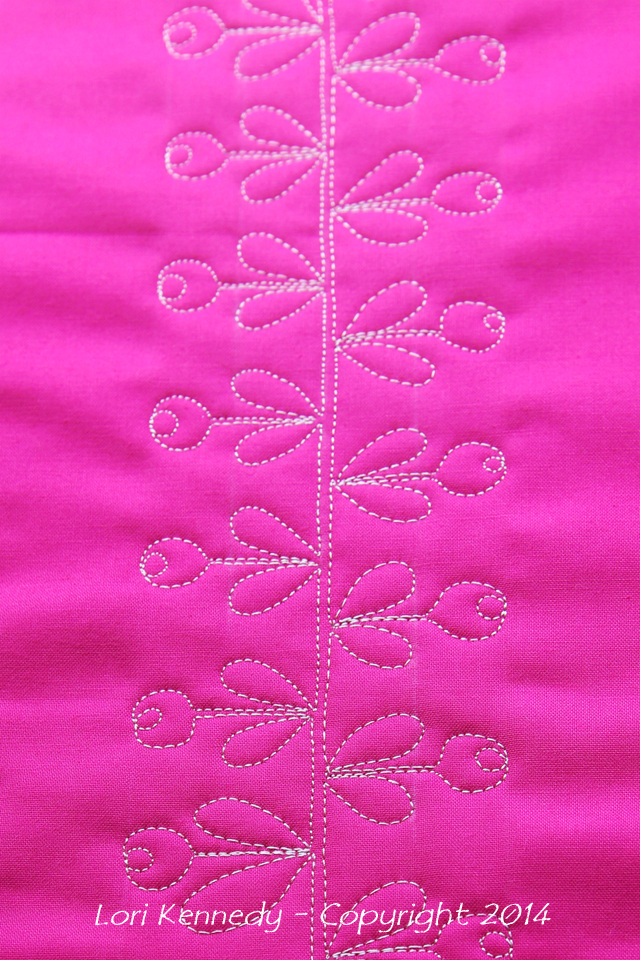
Begin by drawing two lines equidistant apart. In the sample below, the lines are 1/2 inch apart. This would look great much larger, too–so try it with lines two inches apart if that fits YOUR quilt better…
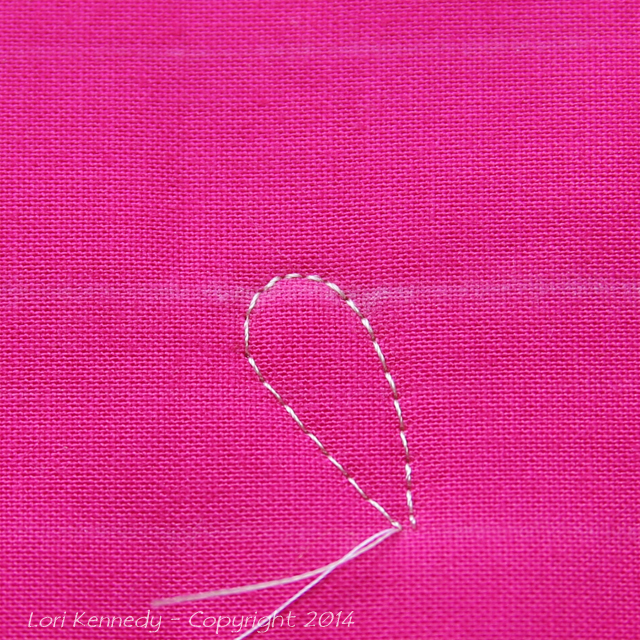
Begin stitching on the bottom “rail”–the drawn line. Stitch a rounded leaf that angles to the left slightly. This leaf should touch the middle rail.
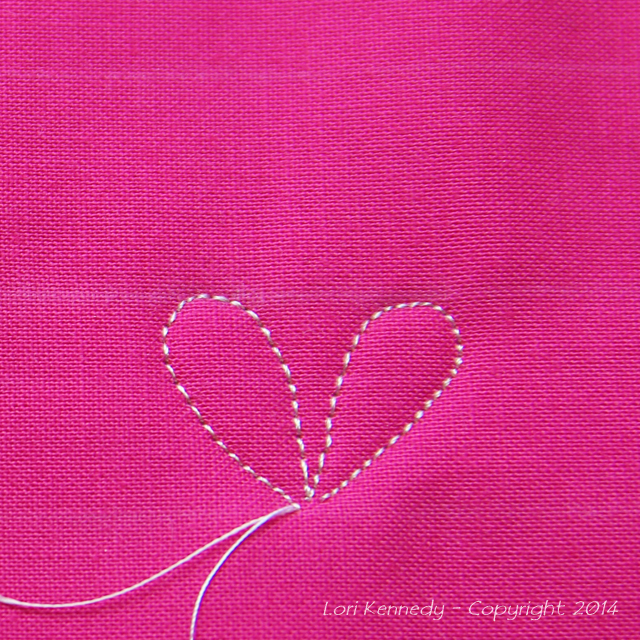
 Next, stitch a mirror image leaf–to the right.
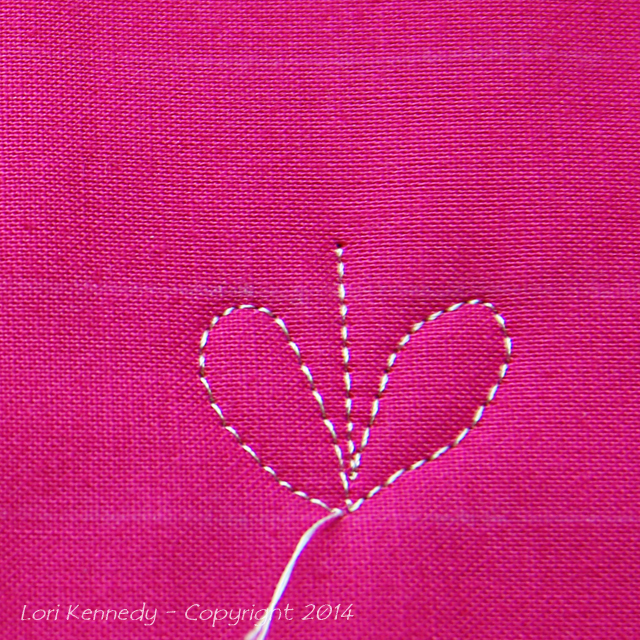
 Now, stitch the stem straight up–a few stitches above the middle rail.
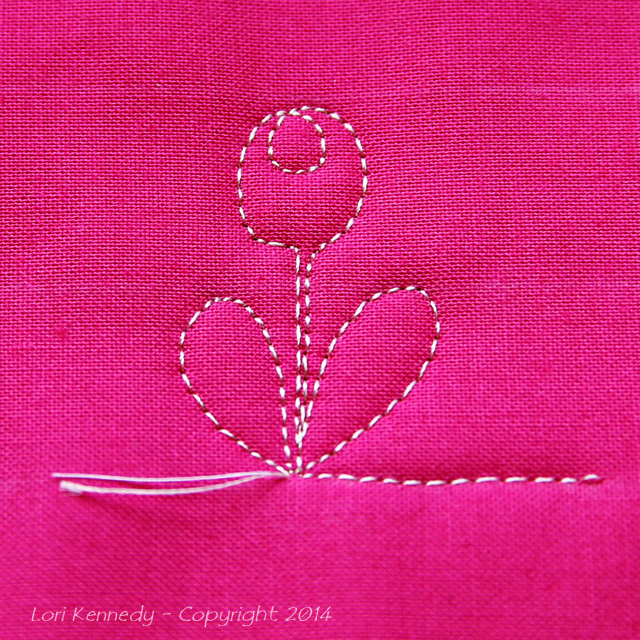
 Stitch the left half of the flower by stitching a half circle to the top rail. Then stitch a smaller full circle.

Finish stitching the right half of the flower…
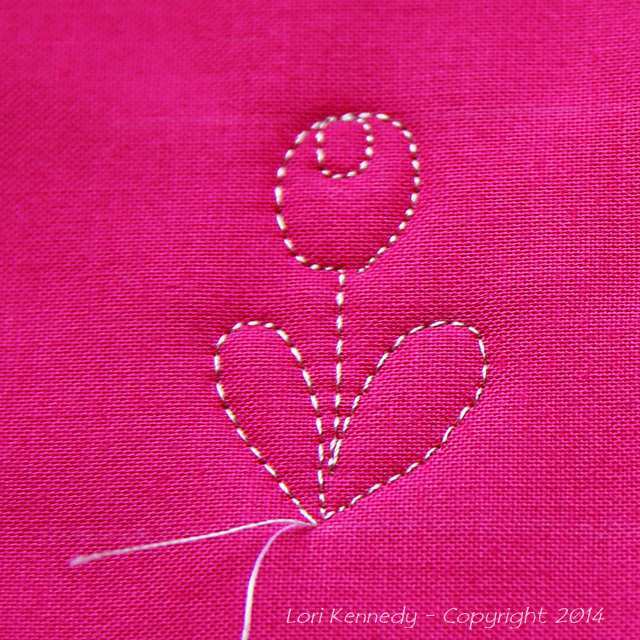
Finally, stitch straight down the stem to the bottom rail and stitch over to begin the next Tulip Time tulip.
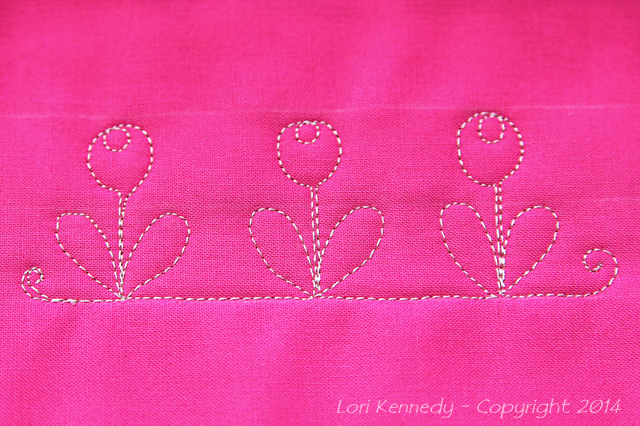
Three in a row would be perfect on a baby’s apron…or a springtime napkin.
 Once you get started, you won’t want to stop! In the sample below, I stitched the first row and then turned the piece over to stitch the second row…(easier than stitching the motif upside down–though that can be done too!)
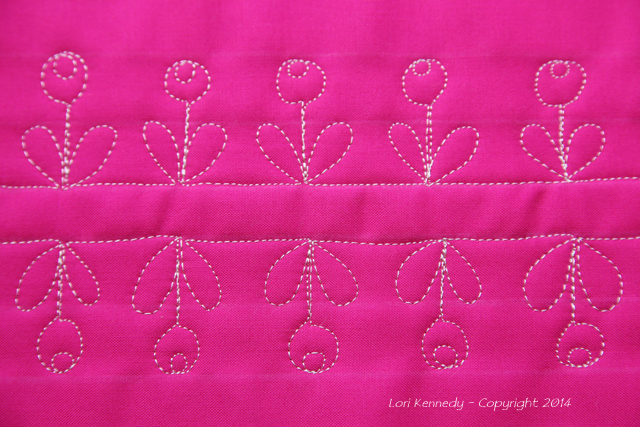 Leave the space between the rows empty…Or, add another design–like my favorite, The Greek Key.
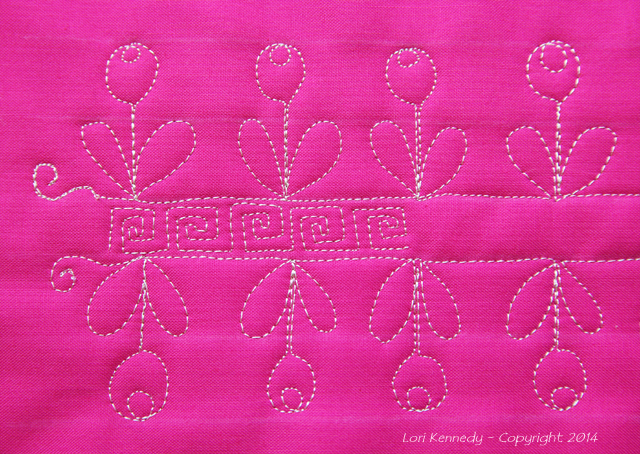 The design looks different if you stagger the tulips:
 Once you get started, you won’t want to stop planting tulips everywhere! Happy Gardening!
THE GIVEAWAY
There’s still time to enter the giveaway for Mary Huey’s online course: Unfinished Quilts: Assault Tactics...Read more HERE.
THIS WEEK
Tomorrow: Peggy has a new paper pieced pattern for us…
MATERIALS
This sample was quilted on my Bernina 820 (with it’s extra wide harp space and very large bobbin) using Aurifil 50 wt cotton thread in the bobbin and Robison-Anton Rayon thread on top, using a Schmetz 90 Topstitch needle.
TTFN-TaTaForNow
Enjoy this new tutorial AND make something for YOUR mother…
Tip-Toeing Through The Tulips,
Lori
PS…All tutorials, images and information are the property of Lori Kennedy of The Inbox Jaunt and are intended for personal use only. Feel free to re-blog, Pin, tweet the Tulips–with attribution to The Inbox Jaunt. For all other purposes, please contact me at lckennedy@hotmail.com. Thank you!
18 comments
Teri
Lori
I am sitting outside enjoying, finally, a warm spring evening and catching up on your blog. I absolutely love this tulip!! Cannot wait to try sewing it.
Holly Ann W.
Have to chuckle at Rosemary B staggering through the tulips … lyrics are actually “tip-toe through the tulips” but I guess certain circumstances could lead to staggering 😉 ha! Love the tutorials and subsequent comments and ideas. For this one I think I would use a tall, slim, slightly curved leaf with a sharp, pointed end to look like a real tulip leaf. This would be totally doable in the sequence of construction you illustrate – just a different leaf shape.
rosemarazzle
Rosemary B here:
looking at this again, I have to confess, the staggered tulips are very cute. Staggering through the tulips — isn’t that an old song?
😀
ipatchandquilt
Just perfect for my mother!
Greetings from tulip country, Holland!
Esther
Raewyn
Very cute – and I can see the versatility of it. Thank you again!!
Jane pritchard
Lori, again I have questions. Do you iron your FM work? And if, yes, does the rayon thread melt? How do you remove your chalk markings from your material?
I must tell you my FM work has improved since I’ve been practicing all your tutorials. I can’t thank you enough. Now I FM to relax!! You have made a difference in my life. Thank you.
Lori Kennedy
Hi Jane,
So glad you are making FMQ progress! I also quilt to relax!
I never iron my quilts after they are quilted-I like the slightly “puffed” look. I do, however, iron the fabric carefully before I stitch as it is very hard to remove wrinkles after the fact. (Steaming or throwing in the dryer on low heat tumble would probably help.) Ironing is not a great idea for Rayon thread….It is heat resistant, but it doesn’t tolerate high heats.
I usually just brush off my chalk marks. Sometimes I use a white eraser. If there are any marks still left, I just throw my quilts in the wash machine…and use Retayne (commercial dyed fabrics) or Synthropol (hand -dyed fabrics), or any mild detergent.
Roxanne
So stinking cute.
Terry
What an adorable tulip design…thanks so much for the tutorial!!
Julia
Very, very cute . . . . And you make it so easy!
rosemarazzle
Rosemary B here:
This is SO CUTE! adorable
I am going to work on this one!
I got the magazine! THANK YOU!!!
I am so proud to have it.
I will email you later as I think …. I will email you later.
Have a wonderful day Lori.
I hope you enjoy bright sunshine. We have drab post rainy here in Northern Virginia
Lori Kennedy
Yeah, Rosemary! So glad you like the magazine!
Ness
I love tulips! Apparently so do the deer! Very very cute…thanks!
Lori Kennedy
Hi Ness,
Haven’t heard from you in a while…Hope all is well with your back, etc. Have you been busy in your woodshop or in your garden?
Suzanna
WHat a nice, clean motif. And the colour of your fabric. Fantastic! (In fact, I now have to review your previous tutorials to see how often I’m influenced by the fabric choice as opposed to the motif itself.)
Shirley McIntyre
This is without a doubt the most beautiful and useful blog that I have ever read, I love getting these posts daily!
WordPress.com Support
Thank you! Please tell all your quilty friends about us!
Mary Huey
What a charming motif!! Looks easy to rescale and one I think I can catch onto quickly — thanks!!
Comments are closed.