

Welcome, Quilters! Welcome to my haunted website. Indeed, I believe I was cursed last week at my quilt retreat…we were talking about people who have stitched through their fingers!…And as I began this tutorial this morning, I did just that! I stitched through my right index finger. I was pinned ( no pun intended) to my sewing machine. I had to sit for several seconds to compose myself before I was able to stretch my left hand across my sewing machine to reach the handwheel. Then, in a small act of bravery (at least I thought so) I turned the wheel slowly to back the needle out of my finger! (Fortunately, the thread was not jammed!)
Hopefully, this has never happened to you…and hopefully it never will! (Incidentally, in the Victorian era, spider webs were thought to bring good luck to quilters--and they were frequently embroidered onto crazy quilts!)
Now that the commotion is over, let’s begin today’s tutorial!

The Spider Web would look great in any Halloween quilt, on Halloween napkins, or decorating a fall pillow. This beginner quilting pattern is quick and fun to sew–and adapts to any size or shape. In the tutorial below, I started with a four inch square.
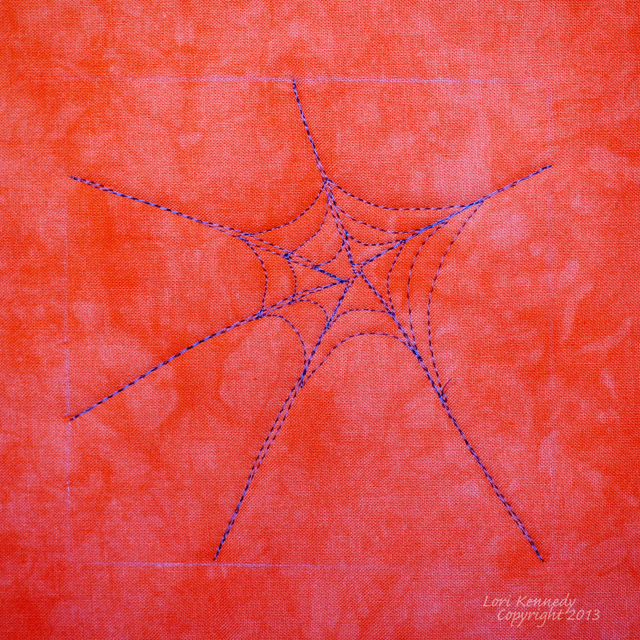
Begin stitching the web in the square, but slightly off-center. Stitch a straight line to one edge of the square and then stitch back ON the same line. Stitch another straight line to the second side of the square and back again to the center. 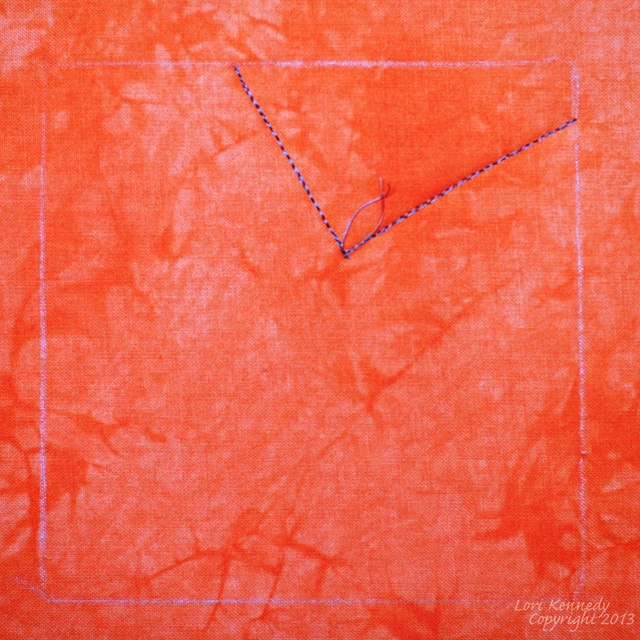
Continue around the square (or whatever shape you are filling) until the space is filled. Note-it is best to have at least 6 lines around the square. If the square is larger–many more “spokes” can be added.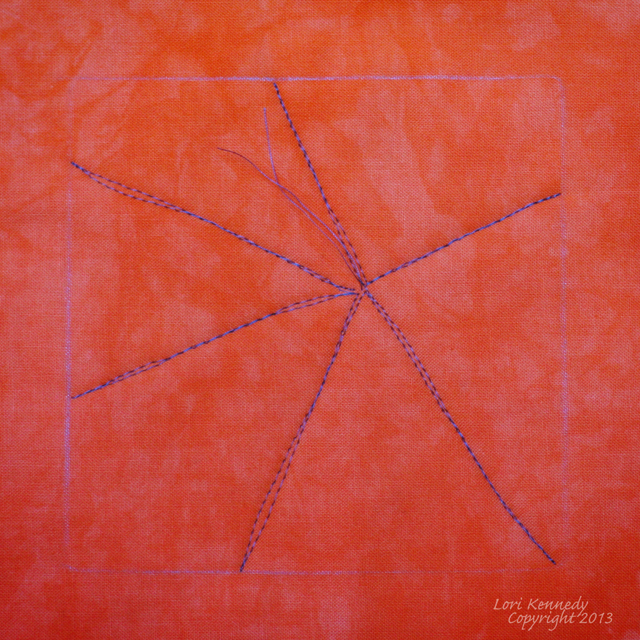
Once you have stitched all of the “spokes”, crawl back a few stitches on one of the spokes to begin the weaving. You should be a short distance away from the center of the spokes. 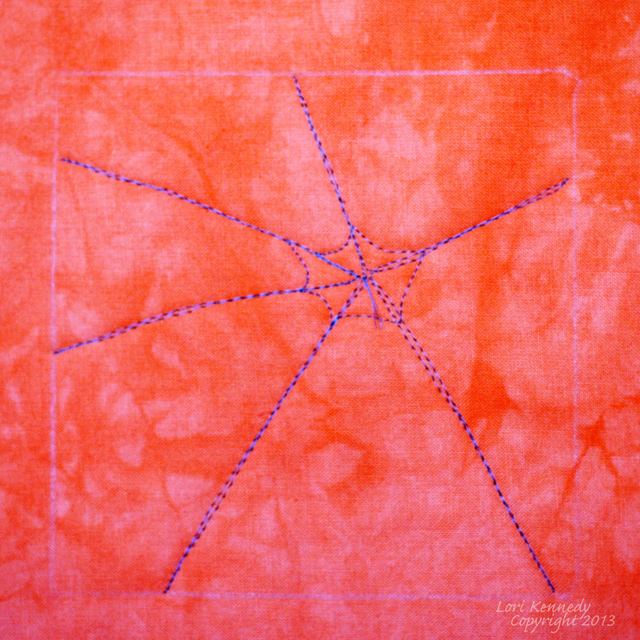
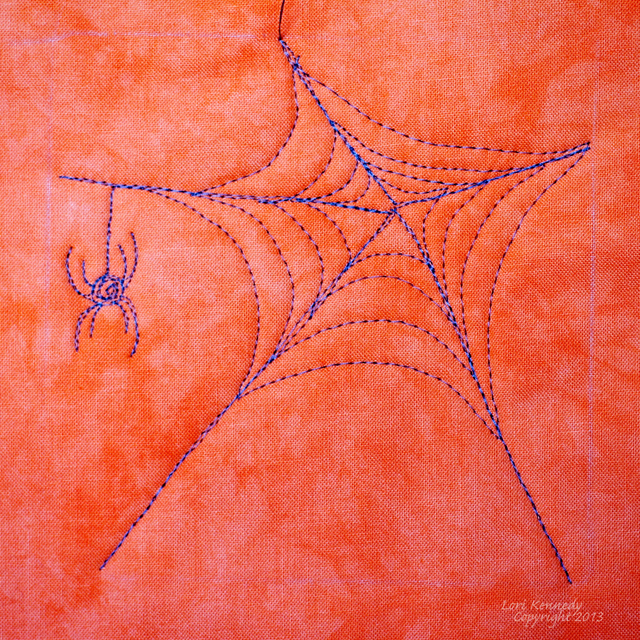
To create the web, stitch curved lines from spoke to spoke.
When you return to the first spoke, end the “sweep” above the first line of stitching. (See photo above.) Continue stitching around the web again.
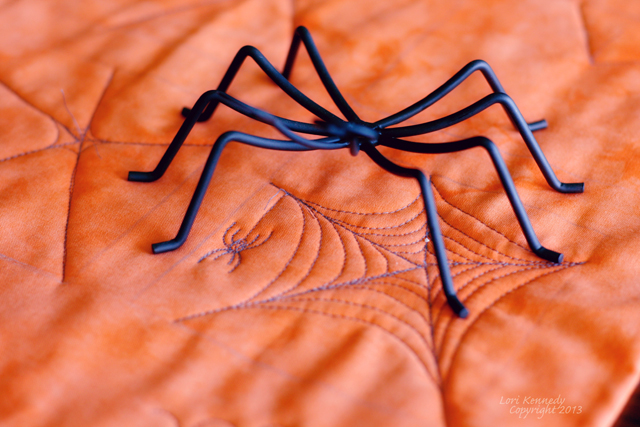
Stitched around the spokes several times,then add a spider!
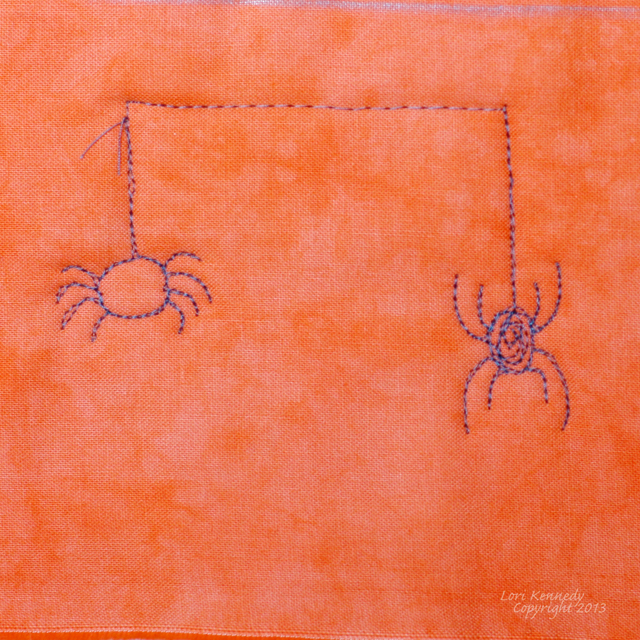
If you like a friendly spider (the kind that invite you to tea) stitch the spider on the left. If you prefer a more menacing spider (the kind that invite you in for their dinner) try they spider on the right…
As long as it has 8 legs, it will look like a spider…
Whether you are stitching on a long arm or on a domestic sewing machine – as I do, (I stitch on a Bernina 820) this pattern (and your fingers) are easy to stitch. So have your cell phone with you and get started on your Halloween decorations!

Tomorrow, I have more Halloween-inspired projects to share! See you then!
Lori
PS–As always…all photos and tutorials are the property of Lori Kennedy and are for personal use only! Feel free to pin or re-blog with attribution to The Inbox Jaunt!
37 comments
Betty Sambaugh
I always put a spider and web on the crazy quilts I make. I’ve read that no crazy quilt is complete without one.
mromine2014
I once stitched thru my finger at a retreat, and in a panic I yanked my hand away and broke the needle off. It was like the old “F Troop” soldier with an arrow sticking out both sides of his hat! Thankfully my friends took care of me, and we never go to retreats without a first aid kit now!
Quilting Tangent
Great spider web, liked the perfect pumpkin also.
Martha Briese
I love the spiderweb!! I did a larger quilt with a skull in the center and added many spider webs.
I also have sewn through my finger. I had told a patient I was working with that I had never sewn through a finger, and two weeks later, I did just that!!! Broke the needle, bleeding on both sides of my poor finger. I bandaged it up, replaced the needle, and continued sewing!!! Icky!!!
I love your blog and continue to be inspired by your genius, thanks so much :^)
Lori Kennedy
I’d love to see your skull and Spider webs. I didn’t see it on your blog…did I miss it–or is it coming up? Let me know, and if you don’t mind I’ll link to it!
Funny that you, too, sewed through your finger after talking about it…some kind of jinx…
Colleen
I love your tutorials. You break everything down into baby steps for beginners like me.
Lori Kennedy
Colleen, I am so glad you like them! The tutorials are designed for what I always searched for (and still do!) Keep stitching!
Gilma S
Thank you for this tutorial. I am currently working on a strippy spider web quilt and this quilting is prefect!
Rhonda Nicholson McKennon
When I was sewing teacher assitant in 9th grade, a girl sewed the needle of one of those big school sewing machines right into her nail. After, about fainting, i finally got the needle unscrewed from machine and couldnt pull it out with pliers, she had to go to hospital. It didnt hurt her while in the nail bed until it was pulled out amd then the throbbing began.
Lynette
Oh, man!! Yep! I’ve done the finger thing – right through the nail, broken-off needle, painful bone for weeks. ::shudder:: But at least the needle wasn’t stalled with me pinned – that would have freaked me even more I think!
KnitNell
Yep i have managed to ‘sew’ my fingers a number of times – nasty! Spiders are lovely creatures and perhaps the reason they were considered to bring ‘good luck’ to Quilters was because their webs historically were used to put over cuts and wounds to help the healing process and reduce bleeding. I love your design and I think spiders should be celebrated!
monette
C’est génial merci pour toutes ces belles idées pour quilter.
MONETTE
SewCalGal
Spooktacular. Love this cute FMQ design and great tutorial. Thanks for sharing and inspiring.
SewCalGal
http://www.sewcalgal.blogspot.com
O
oooooh girl, yowzers! But I’m telling you, the tetanus shot hurts far worse than your finger probably does/will. Glad you claim to be up-to-date ;P
Turbo thumb over here and I send our best wishes!
Marilyn Anders
I hope your finger heals quickly and well! Sorry we jinxed you!
Mary Huey
Thanks for a good illustration, Lori
Beth in AZ
yes..and I stitched thru the pad of my finger and nicked the inside of my nail. I was home alone with a baby..and thought I was going to pass out! I’m so sorry this has happened to you! Hopefully its the last…
Sharon
OUCH! OUCH! Much sympathy going your way. I just know this is going to happen to me one day on my mid-arm. And many thanks for the spider and web design. I am currently quilting a Halloween quilt and will use it!
sewexhausted
I have stitched through my finger… I remember it well! Cute spider web quilting… and I would take the friendly spider! ~Laurie
Queenie
I’m totally in love with this quilting design!
Have a great day.
Always, Queneie
craftymadre
That’s adorable! I have to try it (minus the finger stitching, of course. I hope there was no permanent damage done. It sounds terrible?)
Lori Kennedy
Robin, I was mad that I had just put a new needle in–what a waste! Also, is there a T-shirt? Where do I get it?
Lori Kennedy
Thank you all for your concern! My finger is throbbing now! Fortunately, the needle did not go through the nail. Carol, I can’t imagine having to use pliers to remove the needle! And yes, I did sit for several seconds–but I had NO choice! I couldn’t move, and it took me a bit to figure out what I had to do…
Yvonne, my tetanus is up to date. I will go wash it again right now! I guess I won’t be able to wash dishes for a few days…?
Yvonne
No dishes for awhile, keep it clean and watch for purulent drainage or red streaks following your veins, fever, chills…get to the Dr. fast!
Pamela Wynfield
Such a clever and cute design–I haven’t sewed through my finger and I hope fervently not to!
Robin kinley
My accident was on the fourth of July. Thank goodness I had just put a new needle in. I remember screaming for someone to turn off my machine.. Was afraid it would go up and back in again!
momma4anna
Yep! Been there, done that, bought the t-shirt and it hurts like a dickens! the needle went all of the way through the nail and out the bottom of my index finger. I am impressed that you were able to sit for a few seconds before backing out of your finger.
Carol Ashford
I managed to sew through my left index finger too…. two neat stitches then the needle broke…. my husband had to pull the needle out with the pliers. Hurt like crazy but still sewing!!
Rhonda Rannow
I too have sewn through my finger — left index, and yes through the nail too! I wasn’t so calm about it — even went to the doctor for a good cleaning, and tetanus shot! It was sore for days…. 🙂
pamelajeannestudio
I have sewn through my fingers a few times. Once it was through the nail of my thumb! Reading your post brings it all back to me. Yikes!
Yvonne
Poor Lori, I too have sewn my finger and I know what you mean about it requiring some bravery to back the needle out of your finger. Did you go in to have it looked at? Be very careful to watch it for infection. Do you have a current tetnus vac? “The nurse in me is worried for you.” Yvonne, RN
pamelajeannestudio
I’ve done the web before, but the addition of the spider really makes it appealing!
Nora
this is truly my favorite tutorial yet! and I am so sorry to hear about your finger!
Comments are closed.