

Welcome Quilters! Did you know that there are nearly 200 countries in the world? I’m happy to report that quilters from 122 different countries have viewed tutorials from The Inbox Jaunt! That means that quilting is a world wide pastime! Of course, I’m not surprised–because I am passionate about quilting…Now how can we get The Inbox Jaunt into the other 75 countries??? Hmm…we’ll have to save that for another day because we have some stitching to do right now!
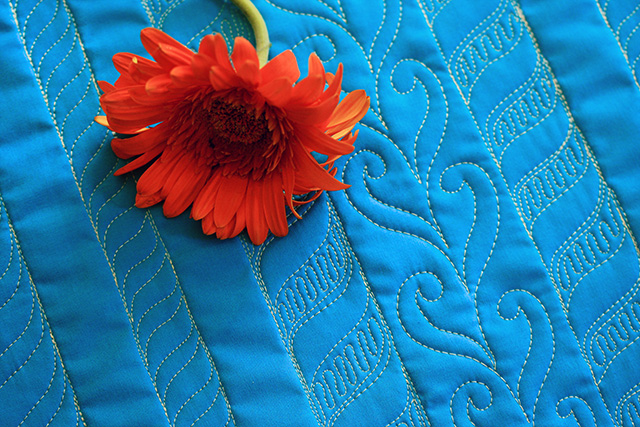
Today, I have an easy (beginner) pattern for you that is a real work horse. The Twisted Rope looks great on any quilt. It is a classic look. Wouldn’t it look great on a nautical quilt? When I stitched the variation in the center of this quilt—with the squiggly fill-in lines–I thought it would look great in red on a Christmas quilt–like candy canes. (I will add a tutorial in December of the candy cane variation.) This pattern can be scaled up or down depending on your quilt.
For this tutorial, draw two lines 1-1/2 inches apart.
Begin stitching on the left rail. Stitch upward several stitches and then sweep across to the other rail. Stitch ON the rail for approximately 1/2 inch. Stop here.
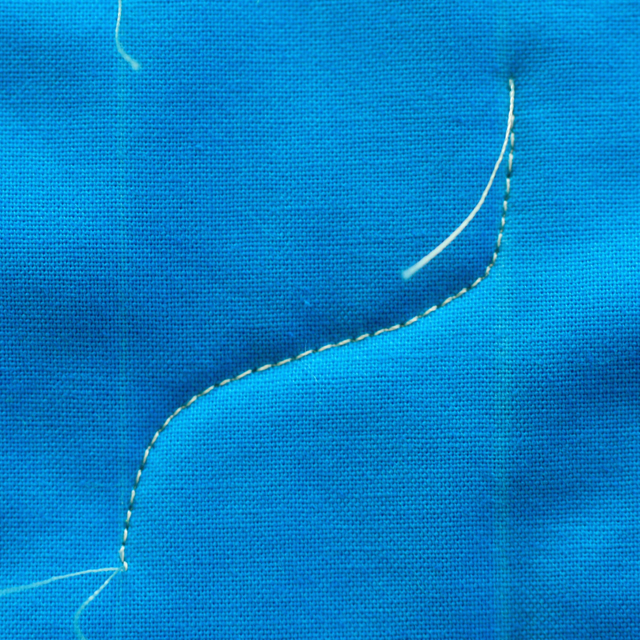
(NOTE--In order to keep a smooth stitched line, do not stop in the middle of this “sweep”. If you need to adjust your quilt, wait until you are at the top of the sweep and before you are ready to change directions.)
Next, stitch down a few stitches, then sweep back to the left rail again, stitching ON the left rail toward the first sweep line, but do no close the line. Try to make your second “sweep” parallel to the first one.
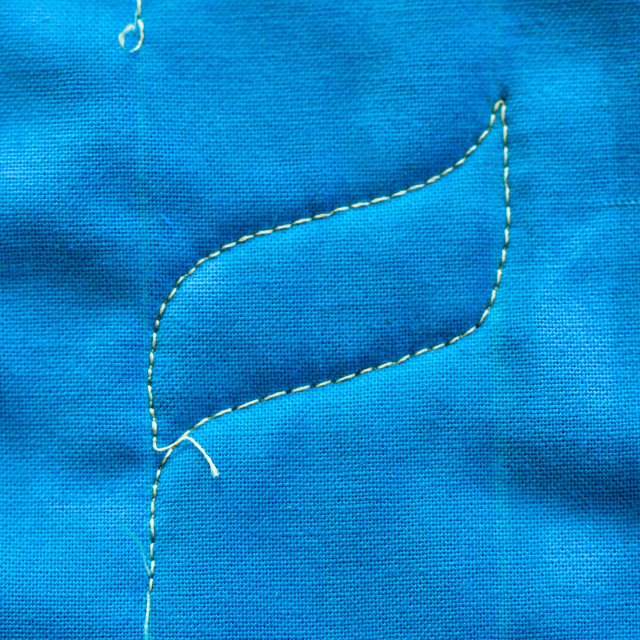
Now stitch ON the rail line approximately 1/2 inch and begin your next sweep to the right rail. Again, try to keep this line of stitching parallel to the first two “sweeps”.
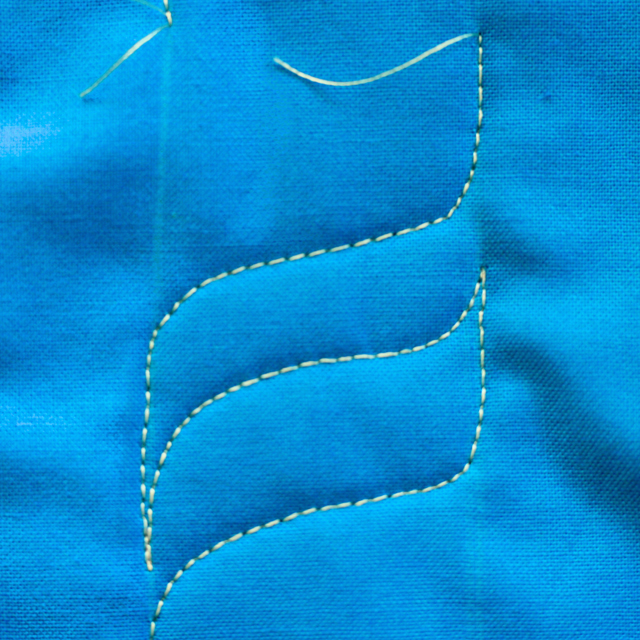
A nice way to vary this pattern is to change the spacing between the “sweeps”. In the examples above, the spacing is even. In the examples below, the sweep from right to left is just a few stitches above the previous line of stitching.
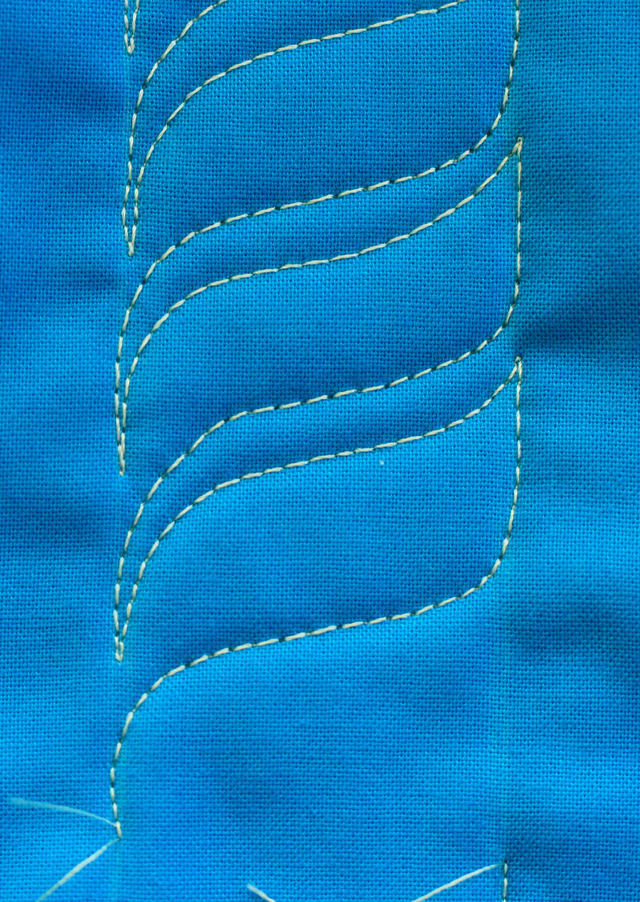
After completing each column of twisted ropes, stitch a straight line on both the right and left rails to close the gaps and give the rope more definition.
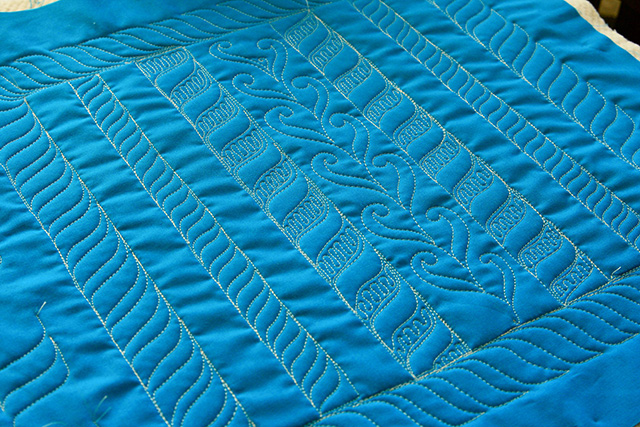
This pattern looks great paired with a curvy motif.

Easy and fun! (Can’t say that about stippling, now can you?)

Please watch for more changes here at The Inbox Jaunt. We’ve added Instagram, Pinterest, and Facebook–give us a look and a “LIKE”. With all this new functionality…just 75 countries to go…maybe…
Finally, please remember that all the images and tutorials found on The Inbox Jaunt are intended for personal use only! Feel free to share and pin with attribution to The Inbox Jaunt. No commercial purpose is permitted. Thank you.
Now turn off your computers, and get stitching!
See you tomorrow, I am reviving an old apple project and I need your advice…(Don’t forget to submit YOUR questions for OPEN LINE Friday.)
Lori
12 comments
Monica Sexton
Could you post a picture how you continue this around corners? The twisted rope
Lori Kennedy
Monica, I will try to post something this week.
Laura
You always make such great tutorials.
Rebecca Grace
I have tried to FMQ these “S-Curves” before, unsuccessfully — but never with guidelines as you suggest. I think I’m going to give this another try. THANK YOU! 🙂
Queenie
Lovely quilting design great for narrow sashing areas around blocks.
Have a great day!
Always, Queenie
Lori Kennedy
So glad I could be of assistance!
Karen
This is great..I’ve been trying to figure out this design for sometime and know I know why I couldn’t do it, it was the disconnect to start the next one..your amazing!
KerryCan
Very interesting–I don’t do machine quilting but this would look great quilted by hand, too!
Lori Kennedy
That’s a great idea. I haven’t done much hand quilting lately, but I love how it looks!
Comments are closed.