

 Good morning, Quilters! It is a lovely, crisp and colorful day here in Minnesota. Hope you are enjoying all the colors of autumn as well! I was very surprised by the response to the vintage photos of paper-piecing that I posted on Saturday! See the post HERE. I was intrigued by the newspaper that was used for the paper piecing in the 1950s quilt my sister found at a garage sale. However, I was amazed by the number of dedicated paper-piecers who responded! You left so many comments and links to new techniques, papers, and quilters that I must give this technique another try! Thank you for your suggestions…I’ll let you know how it goes…
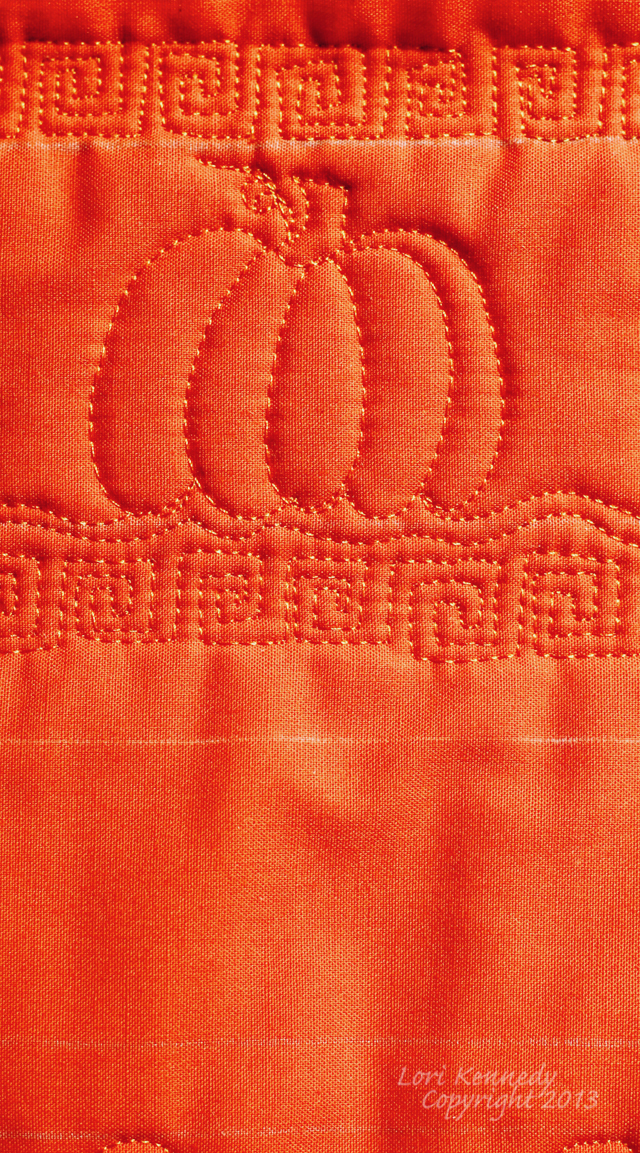
Today, I would like to jump right in with The Perfect Pumpkin. Pumpkins are always perfect because they are pretty. They look great on any Halloween quilt, and also on any fall, Thanksgiving, or harvest quilt you have in mind. I can imagine them mixed with The Oak Leaf (see tutorial HERE) on any quilt. Don’t limit yourself to Halloween quilts!
Pumpkins come in all shapes and sizes, so you don’t need to stitch The Perfect Pumpkin perfectly--make some small, some large, some squat, some tall, just have fun with this pattern!

In the sample below, I began with three lines. The first two lines are 2 inches apart. The third line is 1/2 inch above the top line. (This is where the stem and leaf will be stitched.)

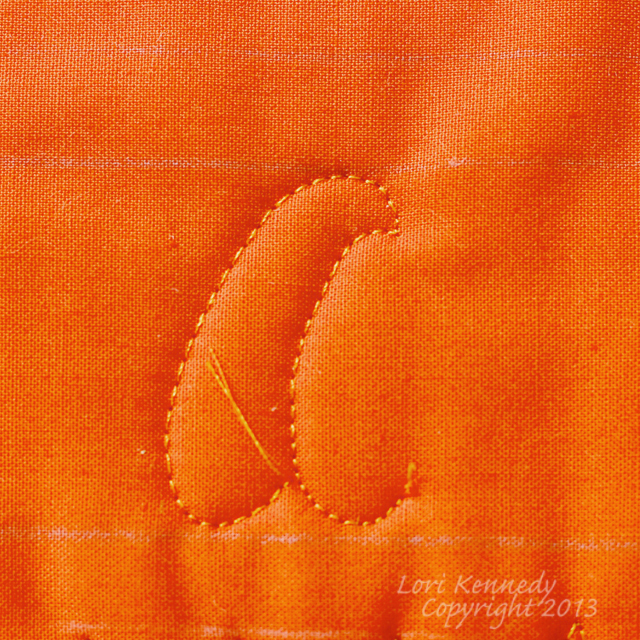
Begin just above the bottom “rail”. Stitch upward and at a slight angle creating the letter “c”.
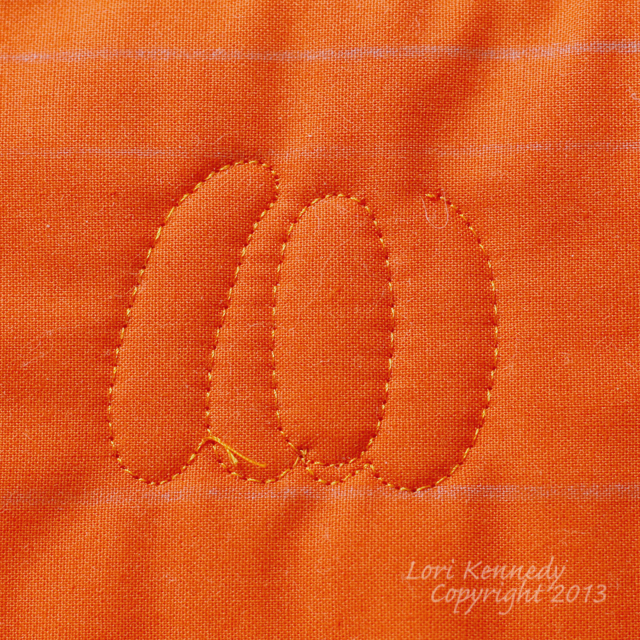
Now stitch a curved line downward -creating a smaller letter “c”. Stop here…

Stitch up and around to create an oval. Stop here.
From the bottom of the oval, stitch to the right-echoing the bottom of the oval, then begin a curved line–like a backward letter “c”- to the top of the pumpkin.
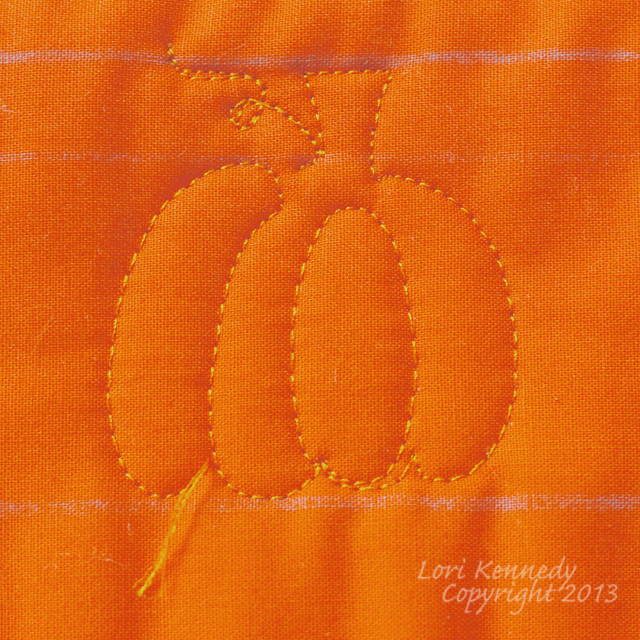
At the top of the pumpkin, stitch a rectangle stem, and if you like, stitch a little curly vine or a leaf…
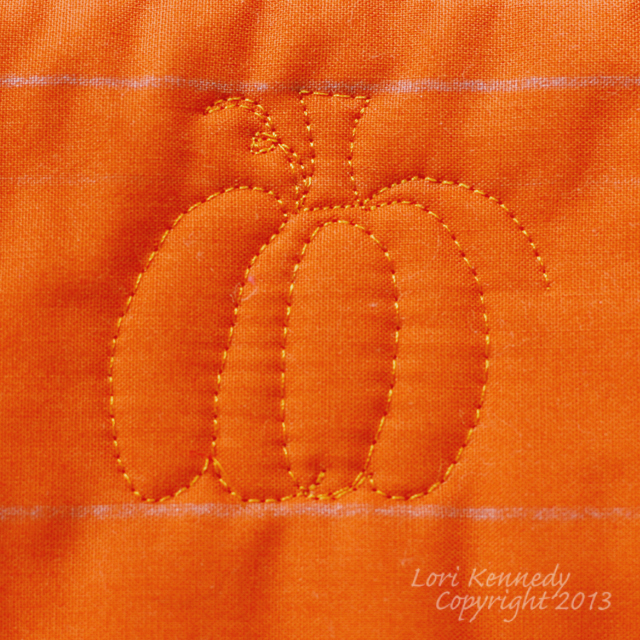
Next, stitch across the top of the pumpkin (under the stem). Finally, stitch one more “backward letter ‘c'” to complete the pumpkin.
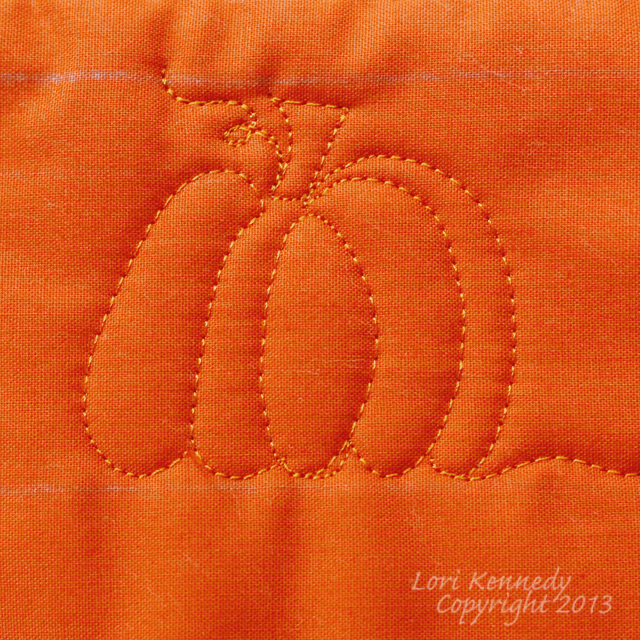
Easy as pie! –though I prefer apple to pumpkin if we’re choosing desserts!
Doodle first-five minutes–then off to your sewing machine to give this free motion quilt motif a try on your domestic sewing machine –I use a Bernina 820–or on your long arm.
FYI: For the above tutorial, I used Sulky thread on top, 50 wt Aurifil in the bobbin and Warm and Natural batting.
Tomorrow–I have a few photos of these pumpkins in a quilt–that I’d like to share…
We will be talking about batting on Open Line Friday this week. Let me know if you have any other questions…
From my pumpkin patch to yours,
Lori
PS…All images and tutorials are the property of Lori Kennedy at The Inbox Jaunt. You may pin and re-blog with attribution to The Inbox Jaunt. Please contact me for any commercial use…
26 comments
Christine
I love your patterns and tutorials. It’s such a great site to come back to over and over again to find new designs to try out.
WordPress.com Support
Yeah! The pumpkin is so much fun. Try The Braided Wheat border too. It looks great on any fall quilt!
Kris Leaman
What do you use for a stitch length? The stitches look to be a bigger size.
Lori Kennedy
Hi Kris,
When doing free motion quilting, the feed dogs are disengaged and/or the stitch length is set to 0. The stitch length is determined by how fast you move the quilt and your stitch speed. The two are coordinated to get an even stitch and the machine setting for stitch length is not a factor.
cari on
Why do my pumpkins look more like green peppers? I think I’m not slanting my c’s from the top down enough.
Pat
Well, I had to try this one. First time I’ve attempted one of your tutorials but I’ll be back for more … I promise! 😀 I opted out of the Greek Keys, though. Here’s my effort:
http://www.flickr.com/photos/wheatens/10331850683/
Irene Shooter
This is wonderful, thanks so much!
Mary Huey
Thanks for the inspiration!
KnitNell
Lovely design.
Sharon Watson
Even me the beginner can follow this tutorial. Not smooth even stitches yet but this is very encouraging in learning FMQ. Practice, practice, practice as so many FMQuilters have advised. I sew on Baby Lock Ellure Plus. Thank you very much!
Linda
HELLO,Your work is amazing! I do not think I will live long enough to get that good!!! I sew on a Bernina 210 and love this machine;sometimes I wonder if my FM would go better if I had a BSR? Probably just need more practice!
love your blog and stitching inspiration! Linda, a newbie to FM
Diana Fink
I love reading your blog and especially enjoy the FMQ ideas. I have been practicing and doing FMQ for about a year or better and I love it. You are an inspiration. So glad I found your blog. I grew up in southern Mn but live in Ca now. I miss the fall colors.
Sandy Holmes
Thanks for being so generous with your talent. When I see your home page, I really enjoy the Fall colors. I’m a Michigan transplant in Texas and I really miss the colors.
Barb
That is just tooooo cute!!! Smart!
Carol Ashford
You are amazing Lori! Thanks so much for sharing with us!
Queenie
This is a wonderful pumpkin quilty design, such personality, love it!
Have a great day.
Always, Queenie
quiddityrox
love, love, love your directions and ideas. It gives me hope for my creations!! I CAN do this, Lori. Thanks for sharing your skill and heart. AND, I love Pumpkin Pie esp. if it has a crumbly topping. Bob Evans has a perfect one on their menu!! Roxanna
patricia s
i look at your work and I my blown away ,i hope that someday that i will be able to do half the work and design . Stay focused and continue to do the beautiful work that you do. patricia
Marie Bostwick
Love this!
Jane
You continue to open my eyes to free motion quilting. I can’t thank you enough.
Pam C
This is too cute!
Raewyn
Love it!! Thank you so much, once again, for these tutorials!!
Comments are closed.