

It’s Tuesday and time for our first Tuesday Tutorial of 2014! As I mentioned yesterday, Minnesota (like most of the country) is in a deep freeze. The thermometer is stubbornly stuck at -15 F. (Which is a heat wave compared to yesterday’s temp of -42F.) In weather like this, it is impossible to quilt daisies and tulips…Today I offer–The Snowflake, (and a few snowballs) for your free motion quilting tutorial of the week.
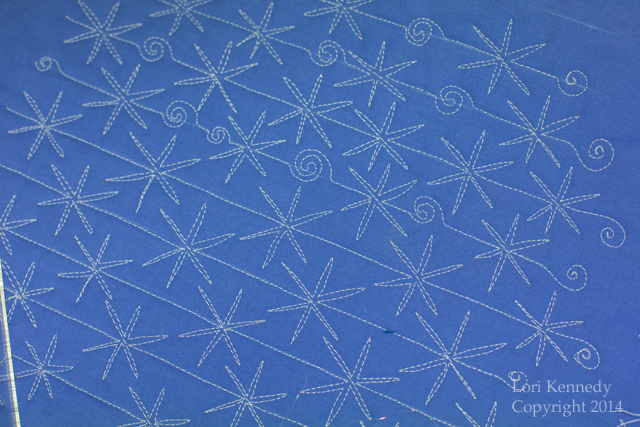
This pattern can be stitched in long rows. Add a few snowballs (see Spiral tutorial HERE) and you have a gorgeous pattern than can fill a border or a very large space.

In this pattern, I began by drawing lines one inch apart. You may draw your lines farther or closer apart as fits your project.
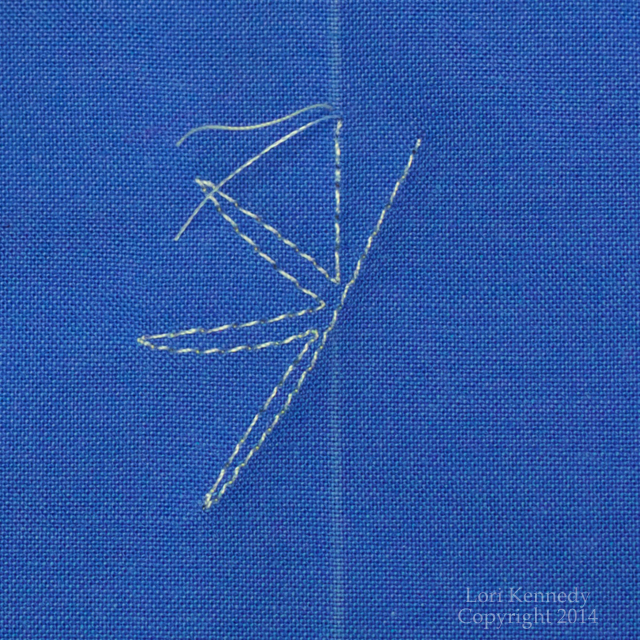
Begin stitching ON your drawn line. Stitch down a short distance, then stitch at an upward angle and back to the center line.
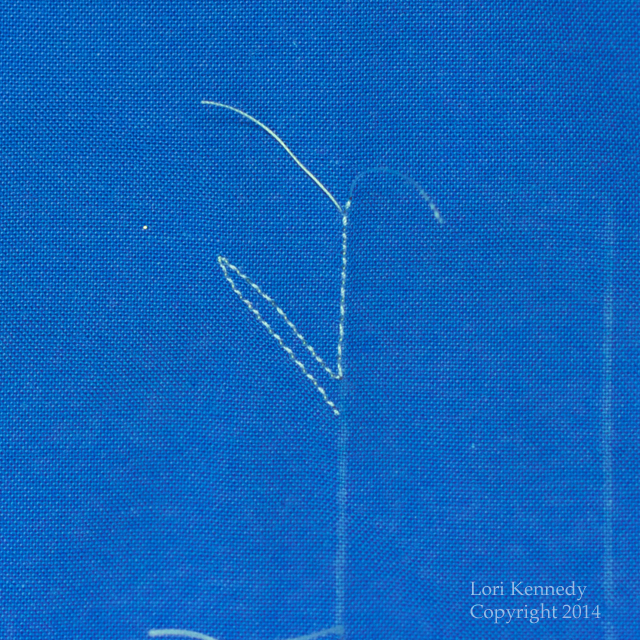
Next, stitch perpendicular to your drawn line and back to the center. (NOTE- do not stitch over any previous stitches and leave a gap in the center of your snowflake. )
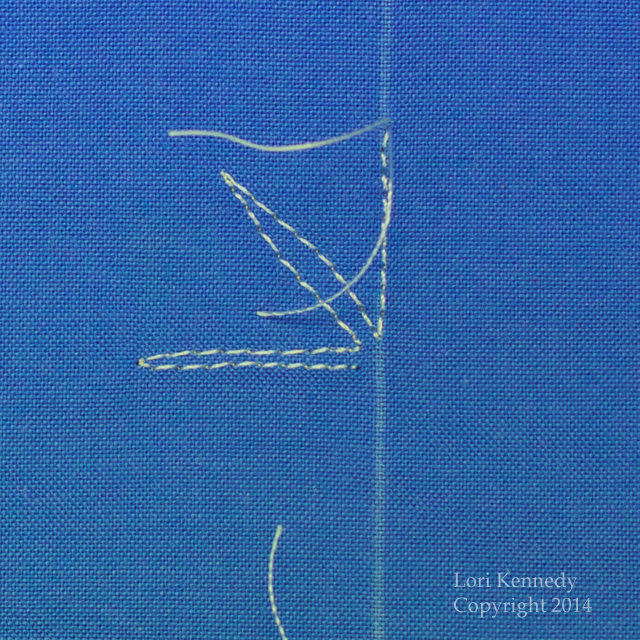
Stitch out from the center and a downward angle and STOP here.
For this part of the snowflake, instead of stitching back to the center…stitch past the center (drawn) line and up to the right of your snowflake.
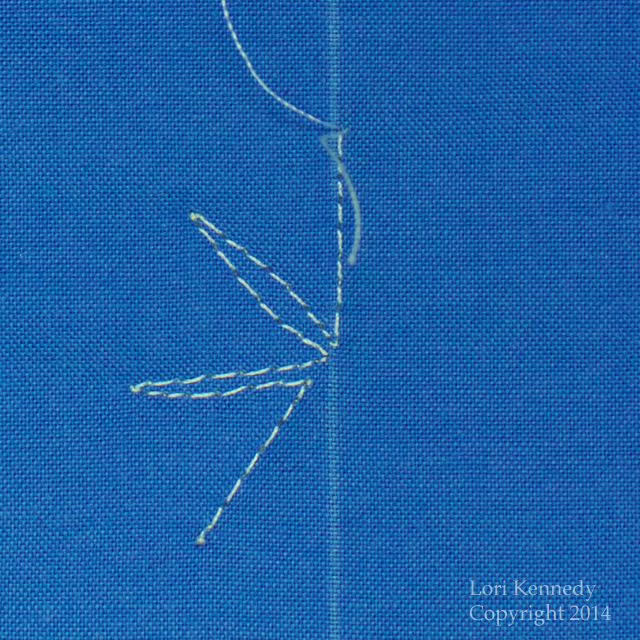
Return to the center line, and stitch another line to the right and perpendicular to the drawn line.
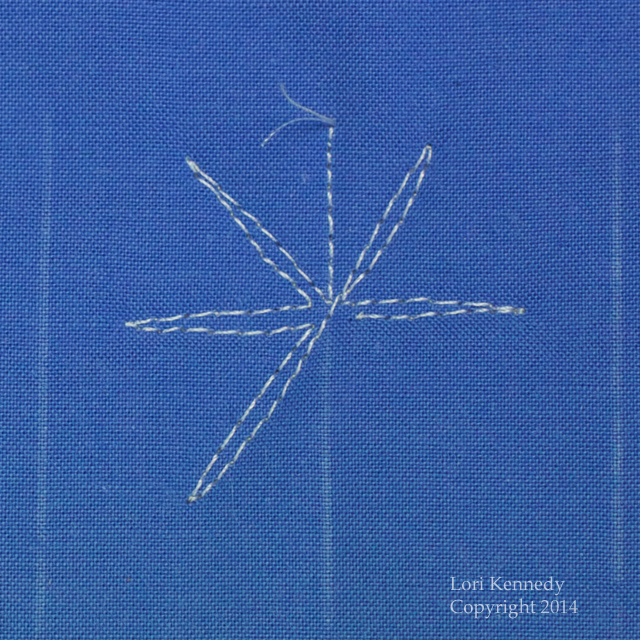
Finish the last “spoke” of the snowflake and stitch down the center line to begin another snowflake.
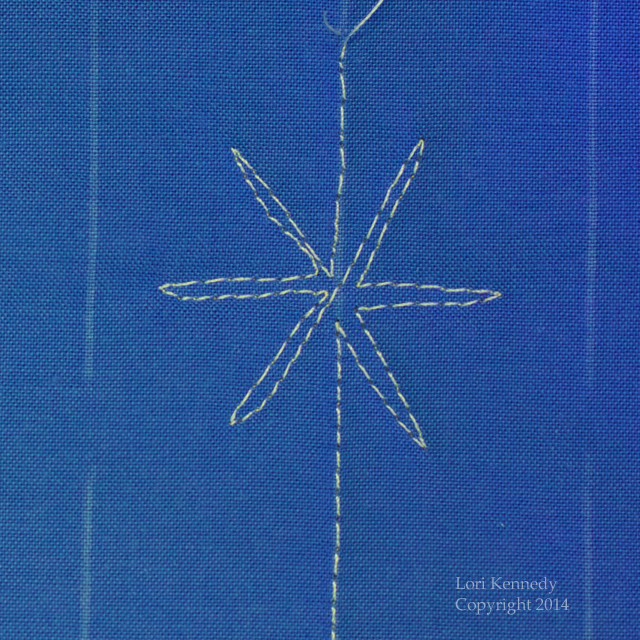
The key to this pattern is to never cross over any other line with your stitching.
By staggering the adjacent rows, the snowflakes create a beautiful fill pattern. But, you know me…when quilting gets too regular, I have to start changing things up–hence the snowballs….
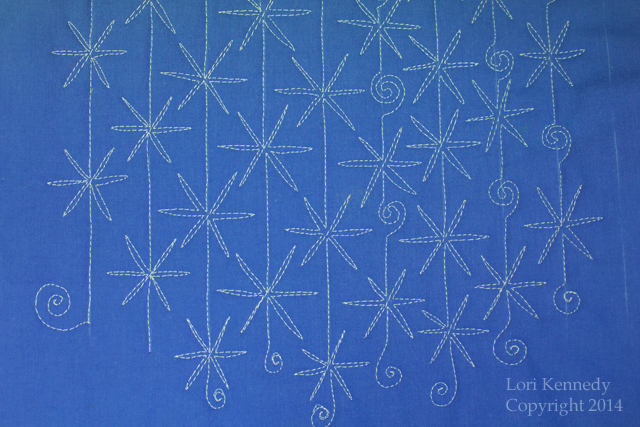
FYI–The Snowflake mini quilt above was stitched on my Bernina 820 with Sulky 40 wt on top and Aurifil 40 wt in the Bobbin.
We will be doing more with this lovely snowflake pattern in the future…so I hope you will take the time to learn it now!
Tomorrow–I have another style of Snowflake I am working on...
Warm wishes,
Lori
PS…All photos and tutorials are for personal use only. Feel free to Pin and re-blog with attribution to yours truly at The Inbox Jaunt.
No commercial use permitted.
23 comments
schultzfamily9
Thanks for the snowflake tutorial! I am finally making a lapquilt for my husband from Moda’ s 2010 Minnesota themed fabric and wanted an appropriate quilting stitch. You do a yeart job with your blog and have so many creative/clever/interesting/ lovely ideas!
WordPress.com Support
Thank YOU! I’m so glad you are here. Can’t wait to see what YOU create!
Gloria Howell
Thank you for posting this great pattern online
Denise Payment
I like the snowflake…I want to use it on my last section of a queen sz. the border is 5 inches wd.I want to go up and down as opposed to going across. Would I go down then turn or should I stop at the bottom each time?
Lori Kennedy
Great question. I think i wiuld knot off and start at the top each row. I think you might get less twist in the quilt and you wont have to learn how to do the motif upside down. Though for this motif it wouldnt be hard
Pat Harkins
I think this will be great for a foundation pieced Christmas tree I am working on. Thanks.
Judy Highley
Do you have to use different thread in the bobbin?
Missy
This is perfect for the winter themed BOM I am participating in this year, so I’ll have to wait a year before trying it out! LOL
pamelajeannestudio
Adding the snowballs really makes the pattern sing! Love it. Way too much snow and cold around here. I think we got up to 4 above zero today. Nice day to stay inside and quilt!
Terry
What a fun design…thanks so much for sharing!!!
Rebecca Grace
Ooh, it was only SEVEN degrees in Charlotte, North Carolina this morning — that has NEVER happened before! No snow for us, though.
Your snowflakes are lovely, especially the way you staggered them and threw in a few spiral snowballs.
Leslie Schmidt
This is quite a jaunty design! I love the little curlicues you’ve put in there. Thanks so much.
Marilyn Larkin
Thank-you Lori, here in Australia the weather is quite the opposite to yours and snowflakes are a welcome contrast. I so enjoy the way you demonstrate your designs, make it so easy for someone like me who is not confident in where to go. Hope the freeze starts to thaw soon.
Roxanna
oh, its loverly. thanks!!!
Deb
You are so talented thank you for sharing Us newbies know nothing 🙂
Pat S
What a pretty pattern. I don’t blame you for not wanting to do posies at this point. And here I am whining because it went all the way down to 4F – at least it is still above zero.
françoise 38
Thank you very much for this lovely, pretty tutorial.
Françoise from France ( ! )
Svannah
When starting or stopping, or even if you run out of thread or it breaks in the middle, what do ya do? Start back up a few stitch before and back tack? I’m thinking thats what would be done but out of all the tutorials I have seen…no one mentions what to do if it happens and I’m curious.
Comments are closed.