

 Good Morning, Quilters and Happy Tuesday! With just eight days until Christmas, I know you have a lot to do…but please take 15 minutes to give this pretty pinecone a try. If you don’t have time to stitch it, doodle it! This motif would look great on anything you are making for Christmas, but don’t limit yourself…Wouldn’t it look great on a quilt for your cabin?
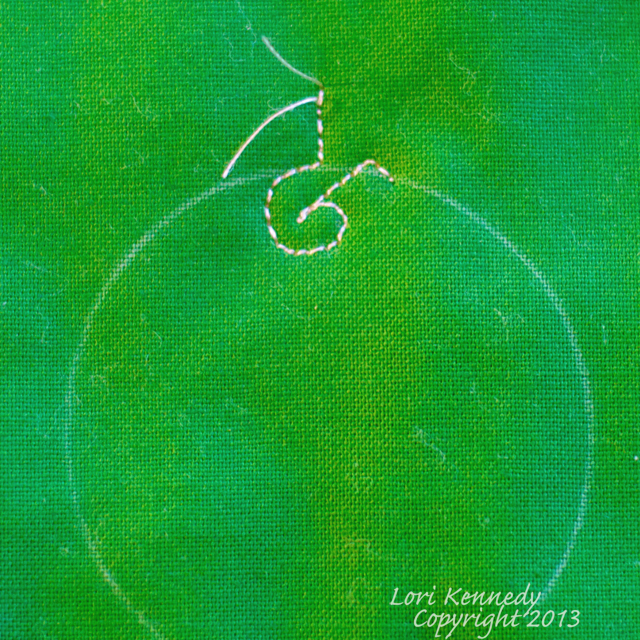
 This pattern begins a little differently than most of our motifs. Instead of drawing straight line “rails”, we begin by drawing circles. I used a two inch circle from this special drafting tool I found at the office supply store, but use whatever is around–your coffee mug, a CD or DVD…or one of the patterns from the ornament tutorial last week…(see the tutorial HERE). The circle is just a guideline for the top of the pinecone. In nature, some pinecones are round, but others are elongated.
 Begin stitching a straight line stem on the top of your drawn circle. Then stitch a partial spiral–like the letter “G”.
 Stitch out from the spiral to the drawn circle.
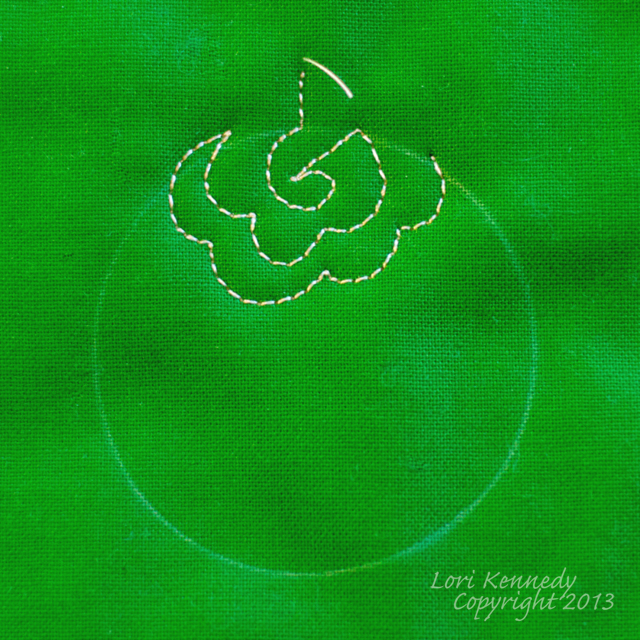
 Next, stitch scallops around to the left side of your drawn circle. Stop here and change directions.
 Stitch a row of scallops back to the right side of the pinecone, contouring down in the center. (See more about contouring HERE.)
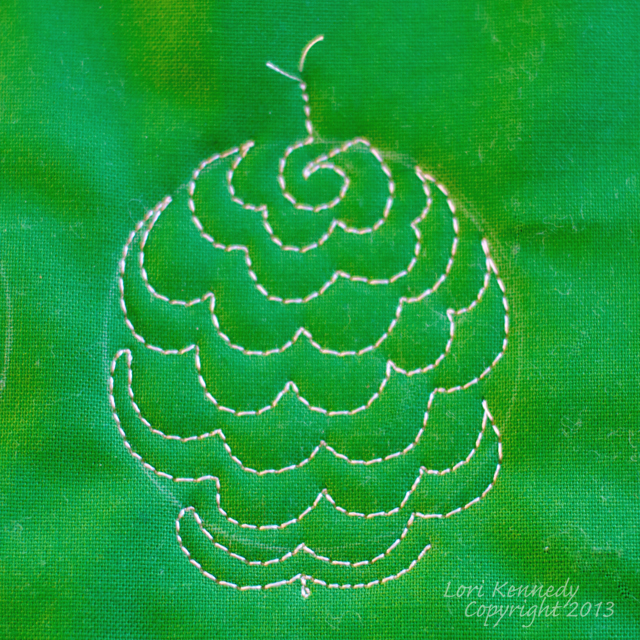
 Continue “scalloping” back and forth until you reach the bottom of the circle.
 Add a little tip at the bottom of the pine cone if desired–and a little bow if you like!
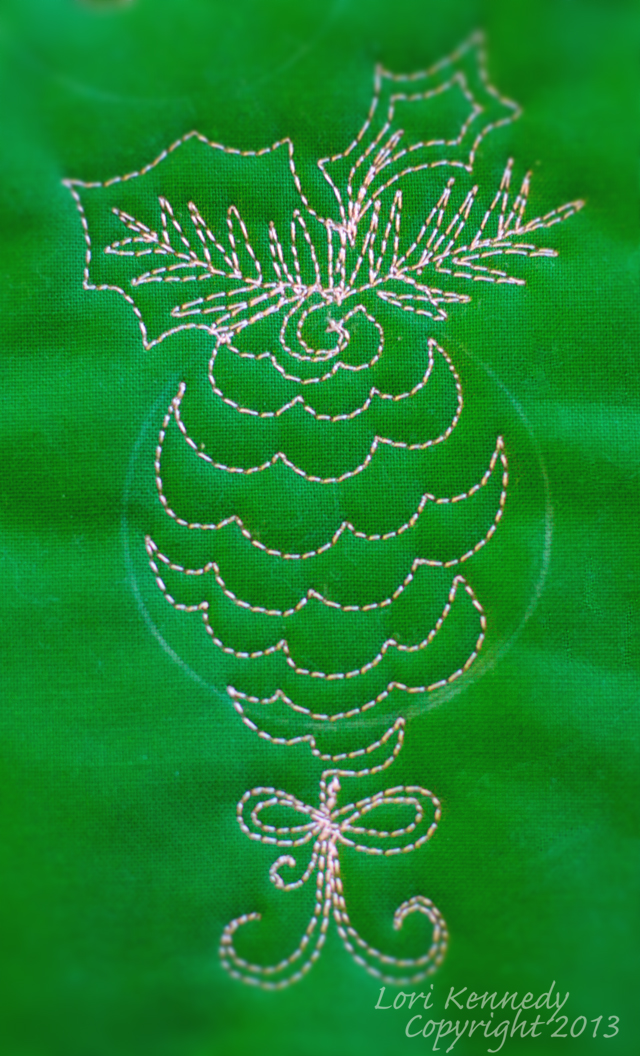
 If you would like to add The Pine Bough or Holly Leaf on top of the pine cone, add it before you begin the pine cone or knot off and begin again at the top.
 Give this motif a quick whirl and then back to the wrapping…Santa’s elves never disappoint!
Lori
PS…There’s a lot more quilting to come in 2013….however, this is the last Tuesday Tutorial until January!
PPS…Please re-blog, share on Facebook and Pin on Pinterest! (with attribution to The Inbox Jaunt). All photos, tutorials and projects are the property of Lori Kennedy and are for personal use only!
34 comments
Carole
Wow, your designs are AWESOME! I love,love, love them, thank you sooooo much for sharing your talent with us! It will certainly take me some time to master the beauty you have in yours, but I’m working on it! Again, thank you, I just found your site, I’m looking forward to your emails!
Lori Kennedy
Thanks, Carole. So glad you’re here!
Elizabeth
Lori, thank you for sharing your tutorials, I quilt on my home machine but have enjoyed trying some of your motifs. I am currently working on a quilt and using the pine cones and pine boughs. They are the perfect addition to my quilt. This is a link to my blog with a photo of my adaptation of your design.
http://elizabethsquiltprojects.blogspot.com/2014/09/fmq-pine-cones-and-pine-boughs.html
WordPress.com Support
The quilt and quilting is gorgeous! Love how you used the pine ones!
Lori Miller
Lori,
Thank you so much for the tutorials. Your FMQ tutorials have inspired me to new heights. My quilts have never looked better. Thank you for the gift of sharing. My wish if for you and your family is to have a Blessed Merry Christmas and a Happy, Safe and Prosperous New Year.
Dortha Agnew
You are a needle genius! You make it look so simple I with your “how to’s” that I truly believe I could do this! Thank you for your sharing heart that encourages so many quilters!
Marianne
This is a lovely idea design. It would make gorgeous tree ornaments, gift wrap decorations, a table runner, or a wall hanging. Thank you for sharing these ideas and how-to’s with us!
Janet Bevan
Hi Lori
I am following from the UK. Really appreciate your tutorials especially the Christmas themes. Thank you and Seasons Greetings.
rascassepoule
un grand merci Lori pour tous les tutoriels très clairs que tu nous fais partager; je te souhaite de bonnes fêtes de noel et à bientôt en 2014
dee
have a wonderful Christmas and looking forward to reading all your blogs in 2014 so happy I stumbled upon you …as well as some of my quilting friends….merry merry from the east coast and lots of snow
Laura
Another terrific design for me to practice. I’ve made some post cards and ornaments with your Christmas designs. Thanks for the great inspiration.
KatieQ
While I enjoy all of your tutorials, I particularly like this one. I never would have thought that a pine cone would lend itself to a quilt design.
Noreen
How you can turn a circle into a pine cone is amazing. Happy, Happy Holidays! Can’t wait to see you in January.
Janet Vickers
Lori, you have an endless supply of talent. I really really love this one. I love them all. Thankyou for sharing. You are my inspiration.
Annie
One of my resolutions fro 2014 is to work on my FMQ. I just typed a note to myself to reference your blog for ideas to try in working on that resolutions. Thanks!!!
Joan
What a lovely design! Thank you for your wonderful tutorials and inspiration. I always look forward to your posts. Wishing you and your family a Merry Christmas and a Happy and Healthy 2014!
Karen
What a great design to finish 2013! Can’t wait for January 2014! Thanks Lori!
Teri
Greetings!! I’m printing the pinecone instructions as I write. LOVE your ideas, patterns and quilting. While I don’t “squeal” while checking out your free motion motifs, I DO smile a lot. Thank you and Happy Holidays. P.S. My husband grew up in the area and went to Stillwater High School…..go Ponies!!
Rosa Faria
Wonderful….as all your work. Many many congratulations.
Merry Christmas and a wonderful New Year.
Colleen
Merry Christmas! Thanks for the awesome tutorials. Enjoy your holiday with family but I can’t wait for Tuesday tutorials to return!
judy
I am too busy right now to try this but after the first of the year I am going to practice on the charity quilts I am making for our guild. My plan is to use my scraps and make 12 quilts for kids. One a month. I will be able to practice my free motion quilting, work on stash busting, and make quilts for a good cause. Thanks so much for sharing!
Terry
I’m so happy I just found your site and want to thank you for all the great tutorials!! Can’t wait to start practicing (after all the holiday rush is over!).
Merry Christmas and a Happy, Healthy New Year to you and yours!!!
Vera Thompson
Thank you for your beautiful quilt designs and breaking them down so a beginner at free motion quilting can be successful. I haven’t seen any I didn’t like. Have a Merry Christmas.
Mary Lou Hoffman OK
I have to echo so many of the gals that have shared before me. I love seeing a new post from you and grab paper & pen to practice then head for a practice quilt sandwich. Thank you for so generously sharing beautiful motifs that I would never have thought how to do with continuous lines! God has blessed you with a unique gift.
Pat in Oregon
How beautiful and simple to do (after seeing your tute!). Thanks for sharing all these great designs.
Diana Fink
What a beautiful design. I love it. I also enjoyed the Christmas packages the other day. Thank you for gifting us with your talent.
Raewyn
Love it!! Thank you again for your wonderful tutorials and the sharing that you do. Best wishes very a very Merry Christmas and a happy festive season.
liz schaffner
It always amazes me how you do come up with such lovely designs !!!
Next year I am going to try all your designs ( at least that is the plan !)
Carole Diehl
Hi Lori, just wanted to thank you for all you do in sharing these tutorials. I really have appreciated them and used them for my quilting. You make all these cute patterns so easy! Thank you again and have a great Christmas season.
Lori Kennedy
Merry Christmas to you, too Carole! I am thrilled to hear that you are enjoying the tutorials.
Diane T
You are truly talented & so unselfishly generous. I am so happy that you make these tutorials so that even I could re create your design.
Lori Kennedy
Thank you, Diane. I’d love to see your creations!
Teresa in Music City
Lori, I just wanted to take a minute to say thanks so much for sharing your wonderful motif tutorials each week with us! I haven’t commented, but I follow by email, and I give a happy squeal every time I see a new post from you :*) I’m also sharing on Facebook and Pinterest!
Hugs & Blessings to you and your loved ones this Christmas season!!!
Lori Kennedy
Please record said “Squeal” –I’d love to hear it! You are so welcome! I am so glad you took the time to leave a note today–while I rarely squeal (out loud) it is nice to know…
Comments are closed.