
Have you heard the poem, “April showers bring May flowers…” It is raining here, so we better get a start on our garden of flowers!
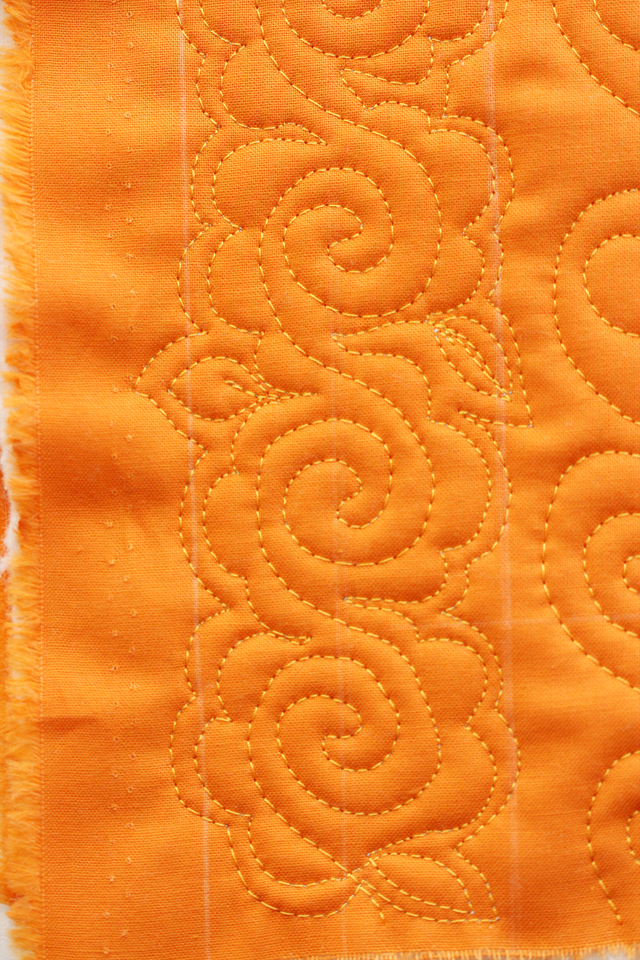
This flower is larger in scale than most of the tutorials we have worked on to date. It is stitched in 5 simple passes. That sounds complicated, but it is not!
The “rails”-(our drawn guidelines)- are 1-1/4 inch apart. The entire motif is 2-1/2 inches wide.
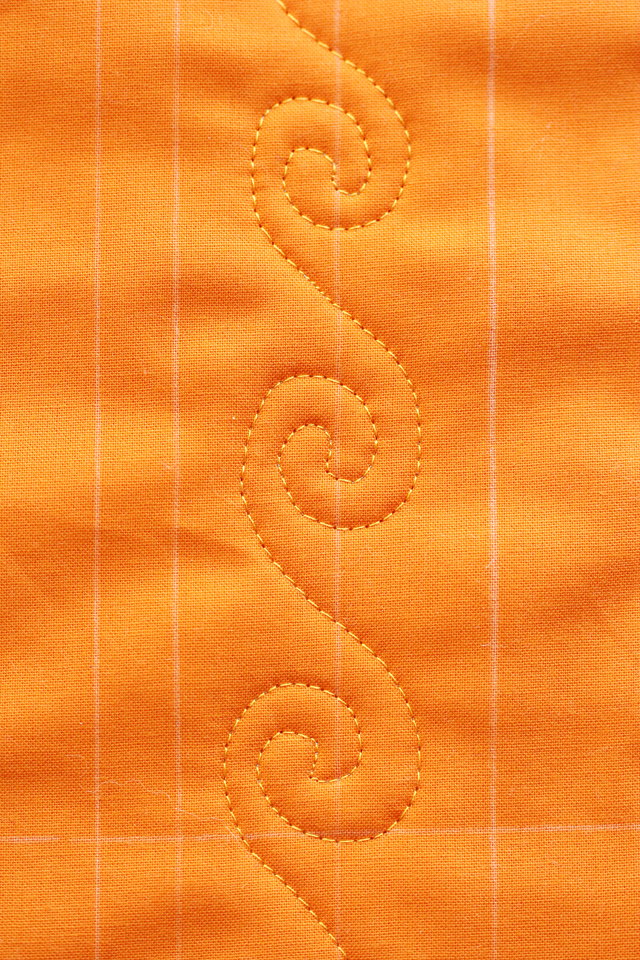
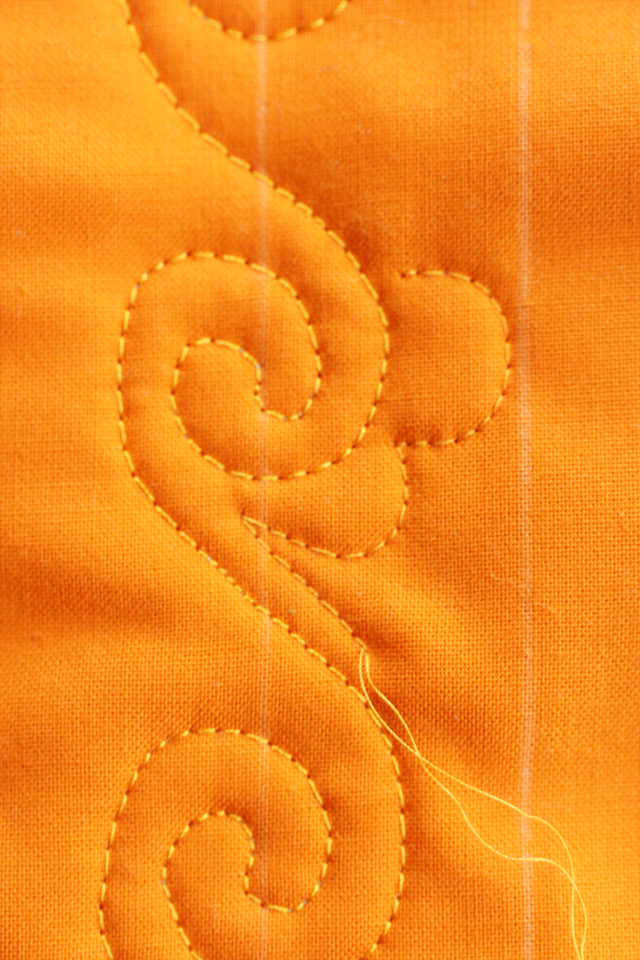
Start by stitching a row of spirals down the center line. This is the first “pass”. (There are two spiral tutorials start here, then review here-or in the Quilt Tab above.)
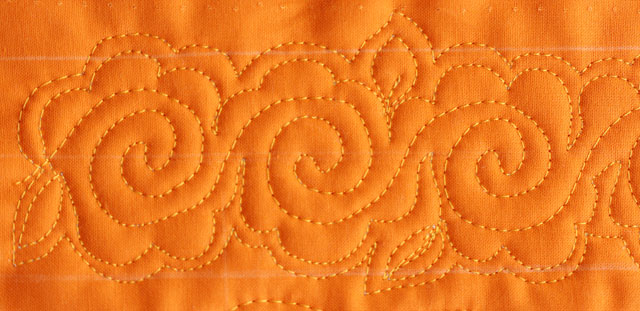
The second “pass” stitching forms the petals on the right side of the motif. –Stitch scallops around the circle of the spiral. If the spiral “tail” is long, stitch next to it to form a stem. Add a leaf if there is extra room. It is not necessary to add a leaf for every flower–in fact, I find it more interesting if the leaves are different and added in an irregular pattern.
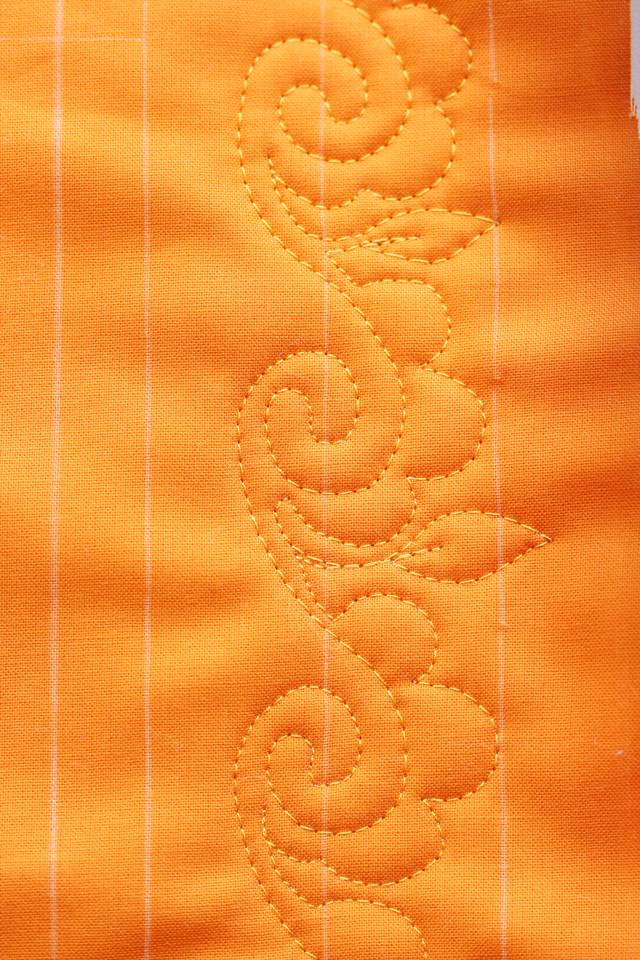
Next, we will stitch the “third pass”–the left-sided petals. Again, stitch scallops around the spiral, and around the “tail” of the spiral. Here again, if the tail is long, you may stitch along side of it to create a stem look, or stitch scallops. Add a leaf here and there…
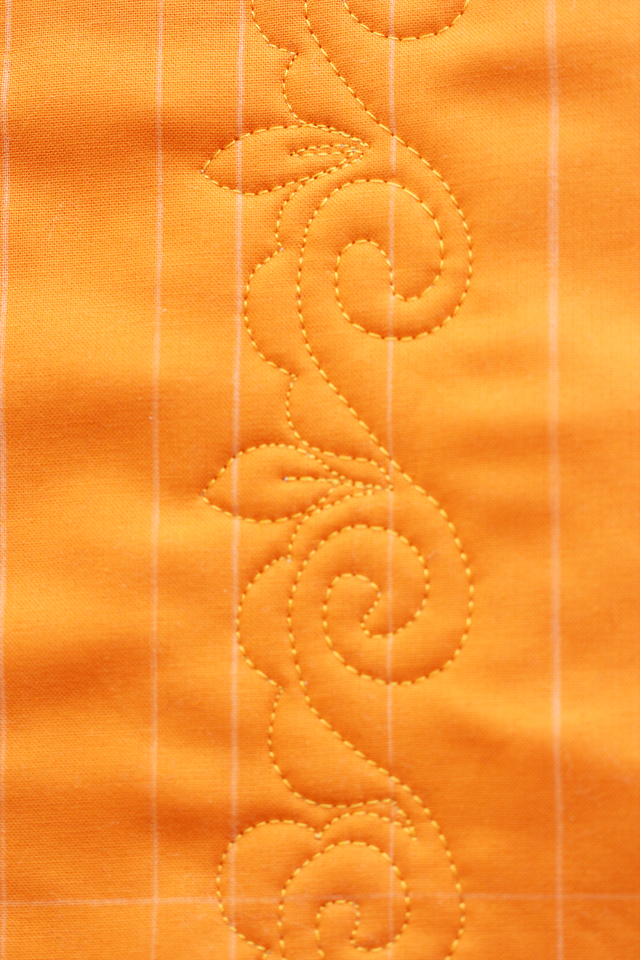
The final two “passes” give the motif a very polished, finished look–and they are the easiest…Simply echo quilt along each side of the flower!

Hmm…Mother’s Day is just around the corner…
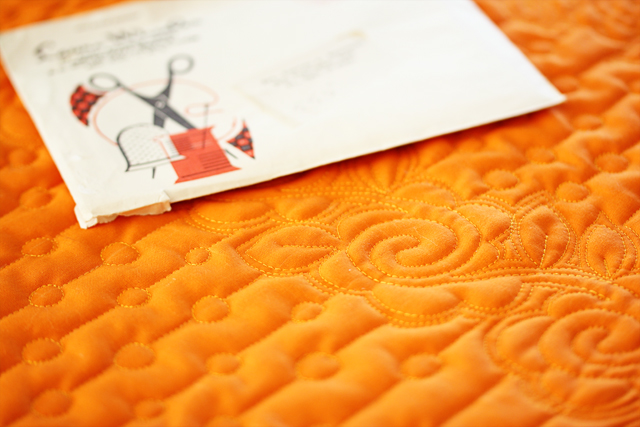
Tomorrow is Work in Progress Wednesday–I will be finishing a table runner featuring The Fabulous Flower–
Next week: We will begin working with circles!
And as always, thanks for pinning on Pinterest!
36 comments
Patricia Calder
Oh, thank you Your tutorial was so easy to follow. I’m so grateful. It helped me out a lot I am incorporating it into a quilt for my sister. She means so much to me and she is just like your flower — beautiful!.
CBB
Great tutorial and great design! I have to try it. (BTW, I also like the other design you did on the quilt: beautiful work!)
robbie sutton
your designs are so doable! ty ty ty
Tomomi McElweee
oh love it. might use for my quilt
NikkiM
Hi Lori
I used this tutorial to quilt one of my quilts. Can I link this post to my blog when I blog about the quilt?
Many thanks
Nikki
Lori Kennedy
Please do! Can’t wait to see it!
Rachael Rabbit
This is so gorgeous – I am in awe ….
Kathy
I love how you have simplified this motif. The result is beautiful.
theinboxjaunt
I’m so glad you like it! With Minnesota expecting 5 more inches of snow this weekend–it may be the only flowers I see for some time!
Rettabug
ooops…forgot to ask…would you mind showing how you did the REST of this tablerunner, too? Did you pre-mark the straight lines to get them so evenly spaced? Did you track along the final outline scallops to move from one to the other? How do you get your little circles so perfect in size & shape? Sorry for all the questions!!
theinboxjaunt
Dear Rett, I am delighted to receive your questions…it really helps me understand what readers are looking for. I will do a post on making the tablerunner, and next Tuesday the tutorial is on how to make circles.
In the mean time, I do pre-mark the lines for the circles. I did track along (or echo-quilt) the scallops, and circles take practice–but mine are NOT perfect. I never see perfection as the goal–they repetition of the pattern often gives the impression of perfection, but if you look at each circle–most are not perfect.
Rettabug
Thank you so much, Lori, for explaining & doing the demos. You have helped me get over my fear of free motion more than any other quilter…honest! I had just about given up on being able to do anything other than a stiple & a meander. Got those down pretty well but anything more intricate, I struggle.
I truly enjoy receiving your blog posts via my “INBOX” LOL
Rettabug
I truly, TRULY appreciate the time you take to break down these free motion techniques. You make them *doable* for those of us who struggle to learn & master this art. I’ve filled several quilt “sandwiches” since discovering your wonderful blog. Thank you & please continue to share your talents?
fondly,
Rett
Maria W
Thank you for sharing, I have to try this lovely design!
theinboxjaunt
I think the landscape could use a few more flowers right now!
Lucie the Happy Quilter
Thank you for sharing. I love your flower design.
Julie C.
I love this! Very well done and you make it look so easy! I’ll be giving it a try.
theinboxjaunt
Can’t wait to see your fabulous flowers! And thank you for re-blogging my Easter Eggs!
Lynette
Wow!! This one’s gorgeous. 😀 Man, I have to think of a project that can incorporate this one FOR SURE!
theinboxjaunt
I would love it if you would forward a photo! I’d love to see all the flowers!
a big fan
how about a snowflake tutorial…. 😉
ugh.
theinboxjaunt
Not a chance! Just look outside!
SandyK
I always look forward to your new tutorials. This one is really great, I love the flowers. Thanks so much for sharing with us each week.
theinboxjaunt
I am thrilled to hear you like the tutorials. Please send photos of your flowers!
pamelajeannestudio
Really, really beautiful design. I can’t wait to try it! Thanks.
theinboxjaunt
I can’t wait to see your version!
Colleen
I love this design and can’t wait to try it!
theinboxjaunt
It is a lot of fun to stitch–and so many ways to use! Thanks for stopping by!
Linda S
this design is absolutely beautiful & so clearly written….thank you!!
theinboxjaunt
I hope you will give it a try!