


Welcome back, Quilters! It seems we need a little sunshine these days. Minnesota is still miserably cold and we have several feet of snow on the ground. Let’s follow the lead of our gardening friends and plant some seeds…We might as well dream about future daisies!
The Daisy Chain is a fresh, modern pattern that would look great on any “girlie” quilt. This pattern can be made much larger and it can be adapted to an all-over pattern. The Daisy Chain is the summer version of The Snowflake–the steps are very similar.
THE DAISY CHAIN TUTORIAL
Begin by drawing three lines, equidistant apart. In this tutorial, I used the grid stencil from The Stencil Company to create lines 1 inch apart.
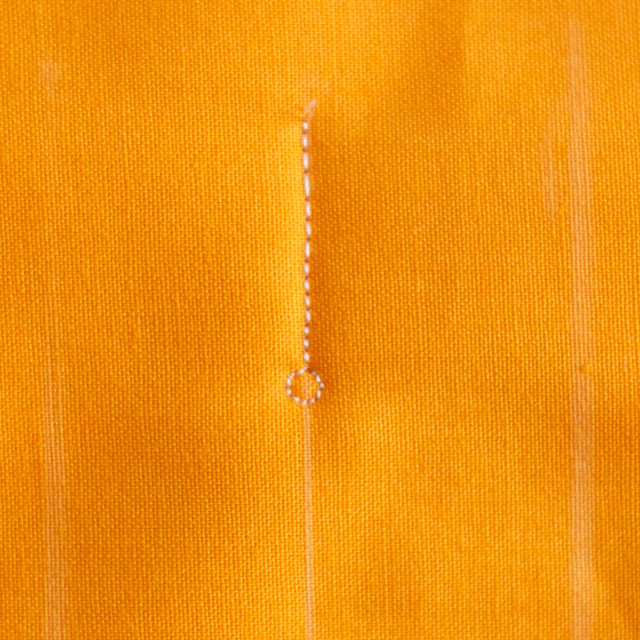
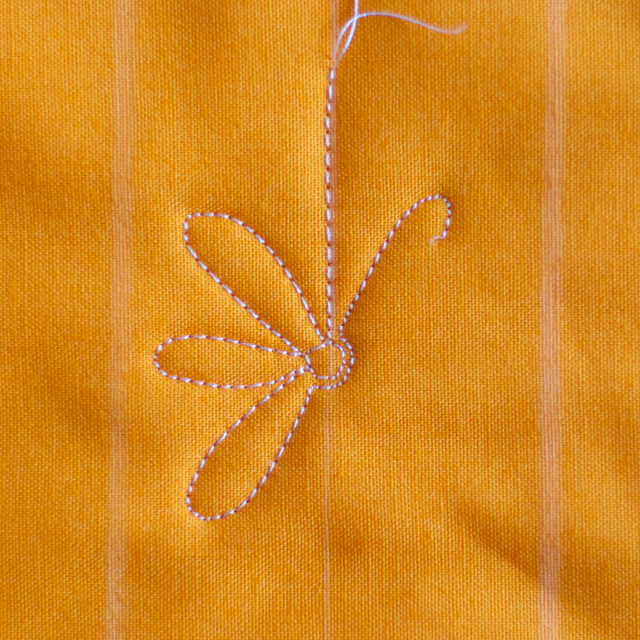
Begin stitching ON the line. Stitch down approximately one inch and stitch a small circle.
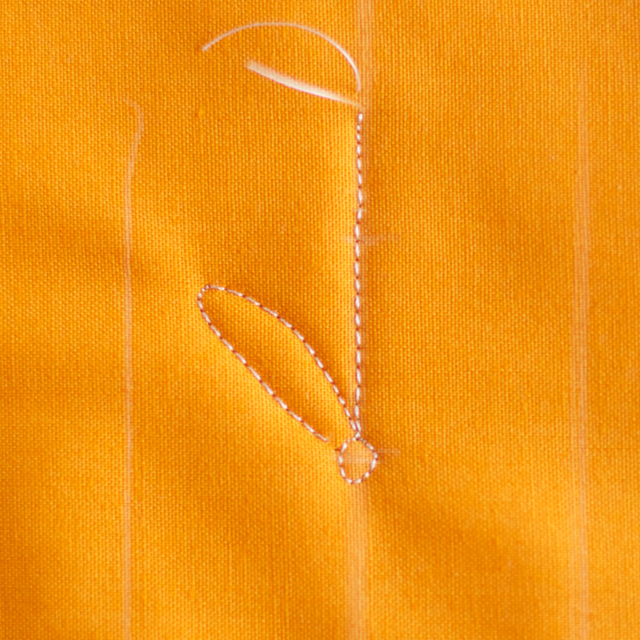
Stitch a thin petal, angle up and toward the left “rail”.
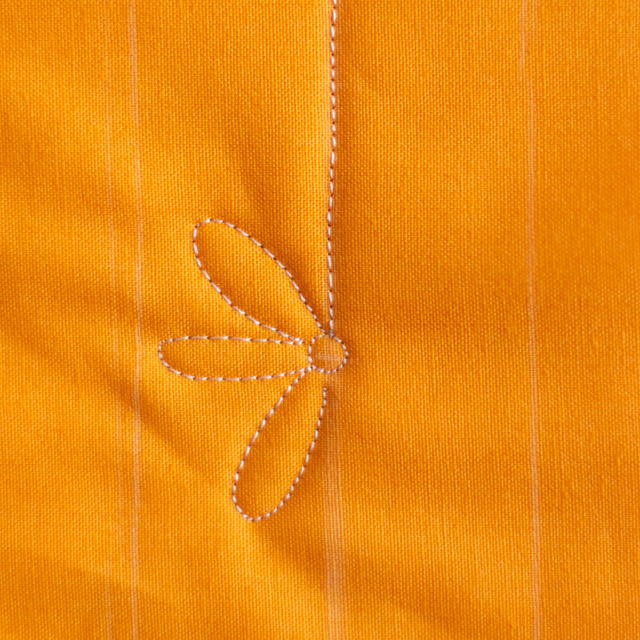
Stitch two more petals on the left side of the center line.
Stitch around the center circle and to the to the center line. Avoid stitching ON the center circle to avoid a build up of thread.
Next, stitch the remaining petals, finishing a the bottom of the circle.
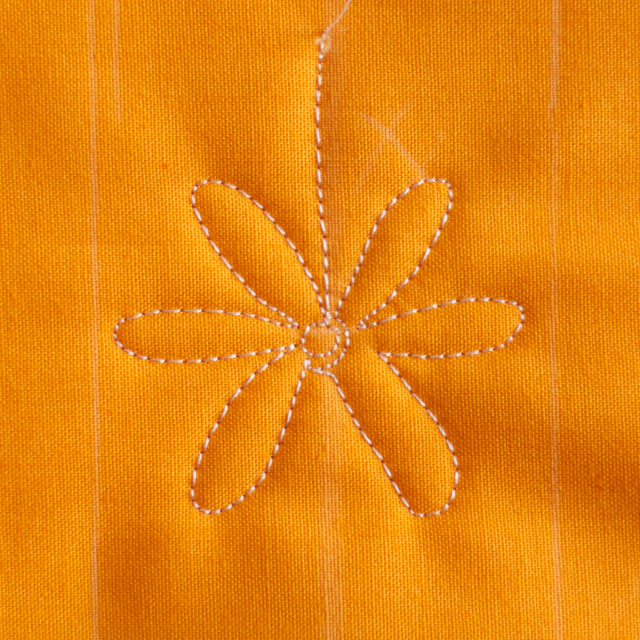
Stitch down on the center line and begin the next flower in your daisy chain.
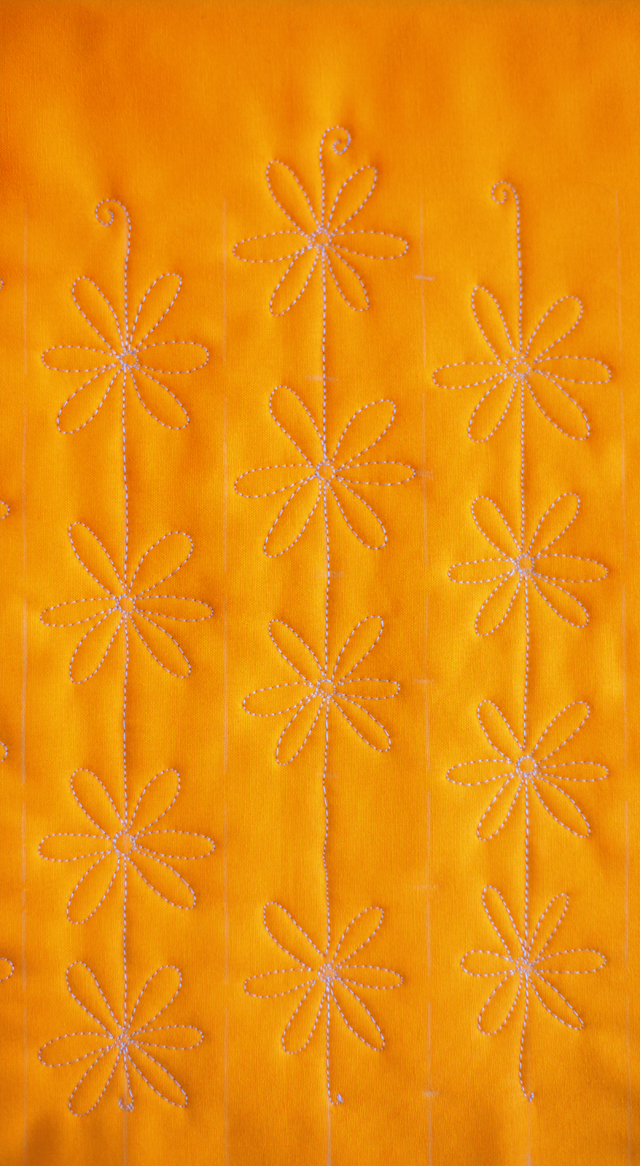
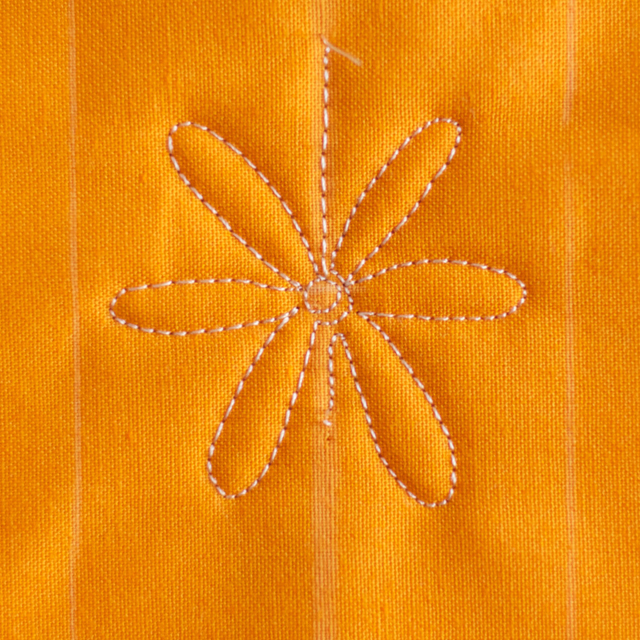
By staggering the daisies in each line, the pattern fills in nicely. Sweet!
Whether (or weather?) or not there’s snow on the ground where you live, let’s chain together a few daisies while we wait for our seeds to sprout!
Happy Gardening,
Lori
PS…All tutorials, images and information are the property of Lori Kennedy at The Inbox Jaunt and are intended for personal use only. Feel free to re-blog and Pin with attribution to The Inbox Jaunt. For all other uses, please contact me in the Garden Center at lckennedy@hotmail.com. Sweet!
29 comments
Michaeleen
That is the sweetest design. I’m going to practice this one.
rascassepoule
What very pretty daisies, thank you so much, Lori
lilquilter
Hi Lori,
I found your website today from a link on AQS’s quiltviews blog, and I love it! I struggle with FMQ and am getting ready to buy a Babylock Tiara (sit-down) in the hopes that with a larger throat, stitch regulator and faster top speed than my Bernina 170, I may be more successful. Plus, I need to make myself PRACTICE which is the hardest part! But your designs have inspired me and your tutorials are EXCELLENT, so I am now very motivated. I am a member of Brandywine Valley Quilters in southeastern PA and the webmaster for our website, so I will be sure to include your website as a “featured link” on our Links page, as I know it will be a valuable resource for our members and other visitors to our site.
A question: You mentioned in your Oak Leaf tutorial last October that you were working on a downloadable tutorial. I could not find it on your website – is it available yet, and if so, where can I find it? Thank you so much!
Cheers,
Lil Koster
Wilmington, DE
mzdaisee47
Oh, yeah! I love daisies! Thanks for sharing this tutorial. It will be used a lot at my house.
Marilyn Larkin
Thank-you so much, now you have helped me to complete one of my UFO’s, have been contemplating which quilting design to put in the sashings. Daisies? Perfect! You are a gem. Hope your snow melts without too much slush and too many puddles, we have just enjoyed a downpour of much needed rain here in melbourne australia.
Lori Kennedy
Music to my ears–“helped you complete a UFO”! Glad to hear you received rain–it’s such a relief sometimes isn’t it?
WordPress.com Support
It’s just practice. Hand foot coordination.
Andreia
Can I ask how do you keep the stitch length consistent when you free quilt like this? Or does it come with practice?
Dolores
I love this pattern!! Thank you for sharing your awesome talent!! You are special.
adaisygarden
I can’t wait to try this! So cute!
paulathequilter
This is a really cute pattern that will be fun to stitch. Thanks!
Mary Helen in OR
And if you ask the wisemen Whether
Whether the’ll be a change in Weather
Then they will answer all together
“Weather is Weather Whether or no”
(Mom used to sing this to me when I complained about too much snow!”
Lori Kennedy
That is so cute! Wish I could hear the melody!
labugaiski
Thanks lori for another great tutorial and design! You make it look so easy!
utahoosier
Like Ness, we woke up to snow on the ground this morning, but I’m thankful for it (and lucky for me I don’t have to trudge out in it for any reason). We haven’t had enough in the Salt Lake area this winter. Hopefully this helps for our water supply this summer. Thanks for the daisies. They are absolutely adorable.
Paula
Love this design! We don’t have your cold weather, we have rain on top of 3 feet of snow this morning. Your bright yellow fabric, white thread and super cute design are just what I needed!
westernwilson
Very pretty Lori! What do you use to mark with, chalk or Bohin type pencils?
Marina
Thank you for all your Tutorials. I love them! Greetings from Norway!
Lori Kennedy
Marina, So nice to get greetings all the way from Norway!
Duane Wiley
It’s so easy the way you break it down! Thanks!
Barb N
Very pretty – lots of uses for this.
Ness
Very very sweet and cute…love love love it!! Good job Lori! I woke up to a snow storm and wind slamming into the house so after trudging out to feed my ponies I will be running downstairs to stay for the day and stitch away. This one will get used a lot I am sure. 🙂
Karen Miller
Thank you Lori — sweet!!
Kathy
Thank you for the daisys! I have 2 baby blankets to do once the cast comes off. These are perfect as are all of your tuts and Silent Sundays!
Yvonne
Very cute! Thanks, I am sure I will use this, maybe on a spring tablerunner.
Sharon Watson
Thanks for a ‘springy’ design!
JulieBeard
Love this Lori! Thank you so much for bringing simple but beautiful FMQ designs for us to practise. I may stop my paper piecing tomorrow for a few hours to do half an hour of practise on this design.
farmquilter
Another cute pattern! This would also be great for a sashing – thank you!!!
Comments are closed.