

 Happy Tuesday and Happy Tutorial Day!
Today we are working on an update of an old tutorial, FMQ Spools.
This pattern is tweaked a bit for our Mystery Quilt-a-Long. By now, some of you have guessed, we are stitching spools onto our grid…
The Mystery is not completely solved…we still have much to investigate.
Last week, we created a spool template. Today, we will be working with the template to create a wide variety of spools.
THE SPOOLS OF THREAD TUTORIAL
 TRACE THE TEMPLATE
For this practice, draw a straight line across the width of your fabric and trace the spools along the line. Space the spools approximately 1/2 inch apart. Don’t measure–this is good practice in “eyeballing”–(learning to space things without a ruler), and is an essential skill for free motion quilting.
 Begin stitching on the STRAIGHT SIDE of the spool. (It is tempting to begin on the bottom line…) Leave a small tail and stitch up the side, follow the line across the top and down the short angled line. Stop at the top of the Right Straight Side of the spool.
NOTE-For this project, leave the tail of threads at the beginning…we want the tails as an added design element.
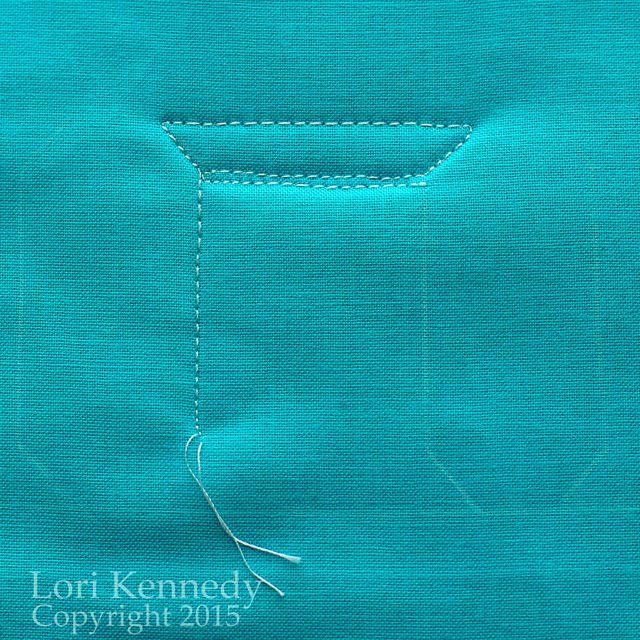 Stitch a line from the right side of the spool to the left side of the spool and back again. (photo above)
 Next, continue stitching down the right side of the spool, along the bottom and at angle back to the thread tail.
 Stitch a double line at the bottom of the spool.
From here, you can decorate the spool with any creative stitches.
Then stitch a loop-de-loop and begin the next spool.
 Decorate the spools with as many different stitches as possible.
(If you’re brave, you can even try The (sometimes) Dreaded Zig Zag…
 Other nice choices include:
The Twist, The Twist Variations, The Twisted Rope…
 You may also add spirals and loops…
 Be a wild and crazy quilter!???
Tomorrow–we will add a spool to our Mystery Quilt…but don’t get ahead of us…
Happy Stitches!
Lori
PS…All tutorials, images and information are the property of Lori Kennedy at The Inbox Jaunt and are intended for personal use only. Feel free to re-blog, share or tweet with attribution to The Inbox Jaunt. For all other purposes, please contact me at lckennedy@hotmail.com. Thanks!
15 comments
Amy E. Armstrong
Cute design — now we just need it digitized for us computerized longarmers. 🙂
Lori Kennedy
NO! You can doodle it and learn it just like those of us who aren’t lucky enough to have a long arm! Right?
Leslie Schmidt
Ok, I was thinking I really wasn’t interested in stitching spools. But then I saw how cute they were when you varied the “thread.” Just adorable.
treadlemusic
Absolutely darling!!!!
Mary
I’ve done 8 practice spools, the hardest part is making the straight lines straight! The decorative middle is slightly forgiving! Perhaps by the time we’ve done 24, they might look something like yours! Lol
Bonnie Blake
Lori is this suppose to be stitching on scrap fabric for practice or on the outer edge of our Stitch a long mystery quilt?
Lori Kennedy
Practice. Tomorrow there will be instructions to add to the quilt.
Carol Elmer
Question about the spool pattern length. Is the whole thing 2 1/4 in length as it looks like with the graph paper? I was concerned because after doing my template I looked at your already done pattern and it looks 1 3/4 total. Or is it important? Quilters are used to being fussy about accuracy. ; – )
Lori Kennedy
You have it right. The spool is 2-1/4 inches tall and 1-3/4 wide
Ness
These are so cute!! You are reading my mind…or my to do list! I have been dieing to start a little spool quilt to decorate my sewing area…this will be perfect for the quilting! Love!
Comments are closed.