


It’s Tutorial Tuesday! and today I have a “two-fer” for you. Two tutorials in one–Tulips and The Figure-Eight Leaf. (No more alliteration, I promise!)

This pretty flower would look great on any quilt. It can be made large and it looks great stitched very small.
Start with three drawn lines, one inch apart. The pattern will be stitched on the center line and the two outer lines will serve as guidelines to keep our stitching straight.
Begin on the bottom and stitch a straight line up the center line. Stop and stitch a semi-circle…

Next, stitch a spiral.

For more on spirals see the “Four Steps to Perfect Spirals” tutorial HERE.
As you spiral out, finish the spiral ON the center line. STOP HERE. From this point, begin the next tulip by stitch a straight line up the center line.

When you reach the last tulip in the line, stop at the same point as above. From the stopping point on the center line…stitch a left-sided semi-circle to close the tulip.

Stitch down the stem and you are now ready to stitch The Figure Eight Leaf.
See photo below:
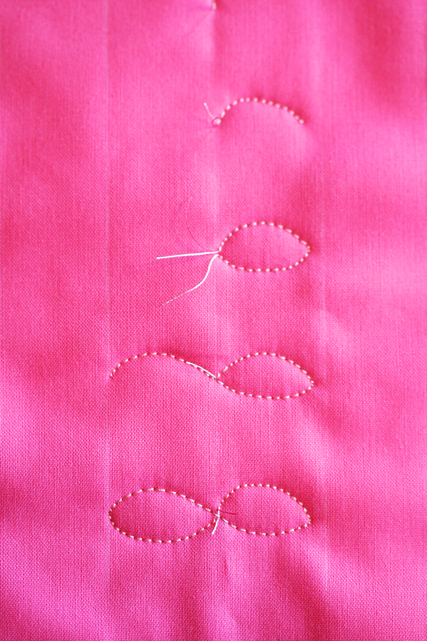
The Figure Eight Leaf can be varied by adding a second figure eight within the first–The Double Figure Eight Leaf (Maybe we should call this the 88 Leaf or the 16 Leaf???)

It looks rather cute all by itself don’t you agree?

I hope you will incorporate The Tulip and The Figure Eight Leaf into your next quilt! Or, use it for a “vase quilt” as I plan to do!
Tune in later in the week–I have a few design tips for you and I hope to have this little gem finished–I have some pink peonies in my garden that would look great on a Tulip Vase Quilt-–Wait! That doesn’t seem right, does it? Maybe, I’ll have to design a peony quilt for my peonies…and arrange tulips on my tulip quilt…but what about my Bachelor’s Buttons??? This could get out of hand very quickly!

Happy stitching!
Lori