


Good Morning, Quilters!
Let’s get organized!
Every January I do my best to get my paperwork organized.
This year I think I have a chance with these clear vinyl folders!
SUPPLIES
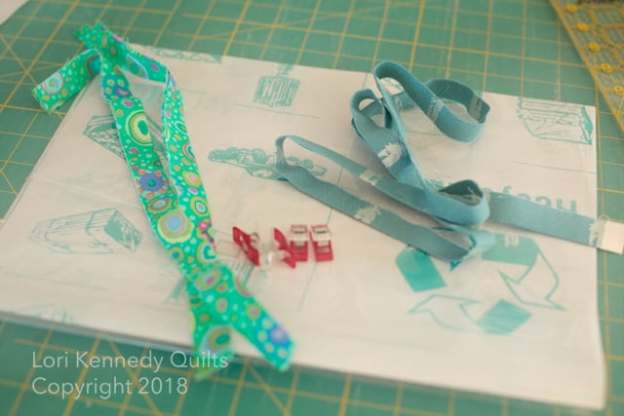
1 yard of 12 gauge vinyl (makes four large and four small file folders) –available at Joann Fabrics or any sewing/craft store
Scraps from quilt bindings-For each folder: 2-14 x 2 inch strips
Sewing clips or paper clips
Sewing machine with any thread

HOW TO MAKE VINYL FILE FOLDERS
Using a rotary cutter, cut the vinyl 20 x 13″
Cut the folders one at a time. Do not try to layer for cutting.
Remove the paper before or after cutting–whichever is easier for you.
Fold the vinyl to create a 10 x13″ pocket.

Cut two strips of binding 14 inches long and any width.
Fold the trim in half–if it is not already folded.
You should have two unfinished edges on one side and a fold on the other side.
Set up your machine for zig zag sewing. Any foot will work–I used the open toe appliqué foot. BERNINA offers a teflon coated foot that slides better on vinyl, but I found it was not necessary for this project

Using the sewing clips, encase the edge of the vinyl in the trim
Zig zag over the raw edges of the trim. (My setting: Width of zig zag=5 and stitch length =1.75.)

Repeat on the other side and trim the loose threads.

Clip the top edges together. Be sure the right and left edges are even and trim if necessary.

Stitch the sides of the file folder using a zig zag stitch.

That’s it–a beautifully stitched vinyl pouch–EASY!!!

Now comes the hard part–getting the paperwork organized!
Once you get started making these, you will be hooked! Create them in a variety of sizes to hold notecards, stamps, receipts…
Here’s to 2018 being the most organized year ever!!!
MORE VINYL PROJECTS-
If you are buying vinyl…buy a little extra to make a quilt overlay to test your motifs–Read more HERE.
It’s a technique I highly recommend.
What about YOU?
Any tips for organizing in 2018?
We’d LOVE to hear!
This week on Open Line Friday–bring YOUR tips for organizing fabric scraps!
Signed,
The Organized Quilter (LOLOLOLOL)
Lori
PS…If you like these motifs and tips, be sure to check out my book, Free Motion Machine Quilting 1-2-3 or any of my Craftsy Videos!
PPS…All tutorials, images and information are the property of Lori Kennedy at The Inbox Jaunt and are intended for personal use only. Feel free to re-blog, pin or share with attribution to The Inbox Jaunt. For all other purposes, please contact me at lckennedy@hotmail.com. Thanks!