

 TUESDAY IS TUTORIAL DAY
Good morning, Quilters and Baseball Fans! As you may recall, when I’m not quilting or blogging, you can find me sitting on the bleachers watching my son play baseball. It’s my favorite pastime!
There are baseballs, bats, gloves, hats (and smelly gym shoes) in every room of our house–including my sewing room. One day it hit me… (no, not a foul ball—an inspiration…)
A baseball quilt!
THE BASEBALL FREE MOTION QUILT TUTORIAL
To stitch this pattern, a circle template is useful. (The templates are available at office supply stores.) However, any circle will work…use a juice glass or a cookie cutter, or the bottom of the spray starch.
Begin by drawing two lines to keep the balls in a row…In the sample below, the lines are three inches apart.
Use the template to draw circles in a row. It is best if the circles touch… In the sample below, the circles are 2-1/2 inches.
Next, use the template to draw semi-circles on each side of the “baseball”. It looks best if the position of the semicircles is varied…
 Begin stitching…stitch the full circle.
 Over lap stitches–either by stitching right on top of the previous stitching or very close to it until you reach a semi-circle. Stitch ON the drawn semi-circle line, and then echo back.
 Stitch around the baseball until you reach the second semi-circle. Double stitch the drawn line. Continue around the outer edge of the baseball and begin stitching the next baseball.
 Complete the entire row of baseballs.
Next, stitch the “baseball stitching”…
 Stitch over each of the double lines with a large zig zag. (NOTE-Create the zig-zags with free motion quilting–not the zig zag on your machine…)
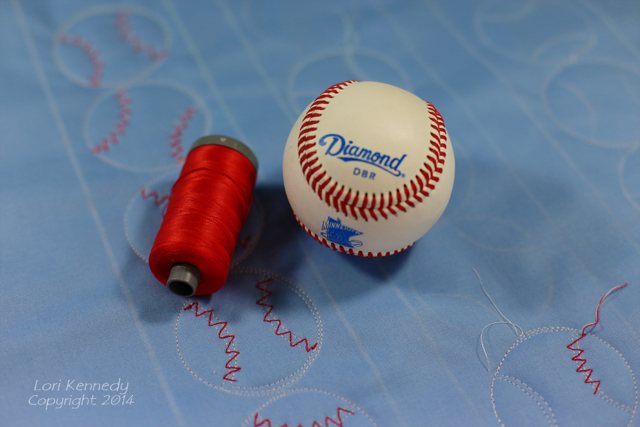
 In this sample, I used white Sulky Rayon thread to create the baseballs. Then I switched to Red Aurifil 28 Cotton thread–a heavier thread, to create a more authentic look for the baseballs.
 NOTES ABOUT OVERSTITCHING AND KNOTTING
The baseballs contain more “over stitching”–stitching right on top of or next to a previous line of stitching– than I usually like in a pattern, but it is acceptable in this pattern because if the casual subject matter and look of this quilt.
Also, each red Zig Zag requires knotting off. In this motif, I knotted by stitching very small stitches back over the pattern for 6-7 stitches to lock the threads. In some motifs this would be too messy, but in The Baseballs, it suits the pattern and is acceptable.
OPTIONAL ZIG ZAG
In order to avoid the frequent knotting…
Add the zig zags right after each double semi-circle is stitched. (Not shown here)…It’s much easier…but not quite as cute…(Do quilters EVER do anything because it’s easier…)
 It’s the bottom of the ninth, tying run is at second, two men out….YOU’RE UP…
Are you a clutch hitter?
I’d love to hear….
If not…stitch up a few baseballs from the comfort of your sewing machine!
Lori
TOMORROW– The Home Run Quilt–something every baseball player in the family needs…
PS…All tutorials, images and information are the property of Lori Kennedy at The Inbox Jaunt and are intended for personal use only. Feel free to re-blog, share, Pin with attribution to The Inbox Jaunt. For all other purposes, please contact me at lckennedy@hotmail.com. Thanks!